Quantcast
  • Contact
  • Portfolio
  • Subscribe
  • Recipes
Menu

Set the Table Photography

photography
  • Contact
  • Portfolio
  • Subscribe
  • Recipes
×
Preserved Lemon Relish

Preserved Lemon Relish

Rachael White April 24, 2013

The first time I made preserved lemons was in the tiny kitchen of our second Tokyo apartment. In the end, we lived in three separate apartments during our 4 years in Japan. I had a particular fondness of the kitchen in the second apartment because in the afternoon and early evening sunlight poured through the windows. There is something about the time between 3 and 7 that I just love. The light is simultaneously soft and bright, bringing a little something special to what can sometimes be the hardest time of day. I may not have had any counter space to speak of, but at least I had light. Fair trade, if you ask me.

Preserved Lemon Relish Ingredients

As I packed lemon wedges into a jar during this maiden voyage to the land of preserved lemons, I remember wondering what on earth I would do with them when the salt had sufficiently infused the rinds, making them soft and salty. Somehow, I managed to use most of them in meals for one because Brad didn't care for them. I also found that I enjoyed them in homemade hummus, which helped to use up a few at a time. But this preserved lemon relish, which I only discovered a short time ago, is the ideal way to utilize this unique Moroccan ingredient. And I should mention that Brad loved this relish! Thank goodness.

Preserved_Lemons
Preserved_Lemons

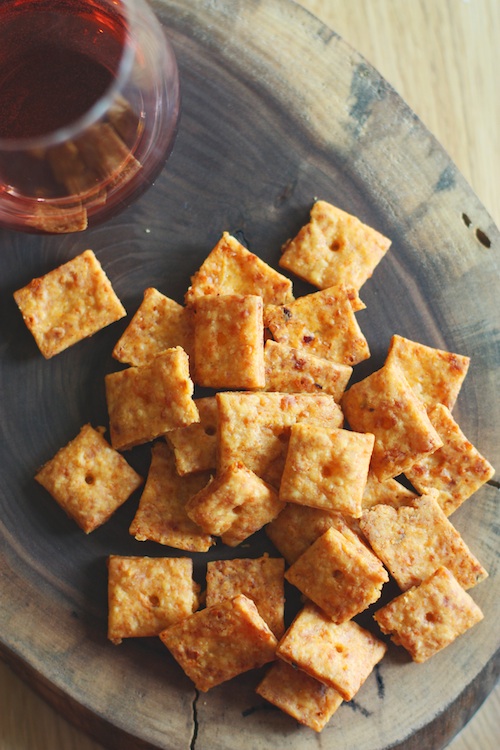
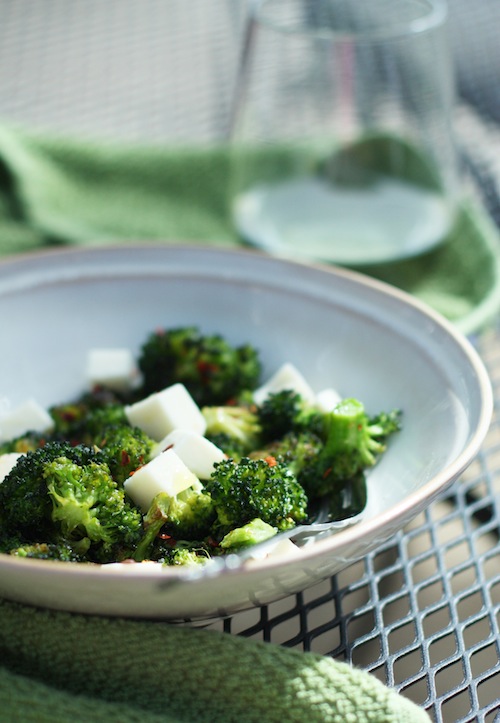
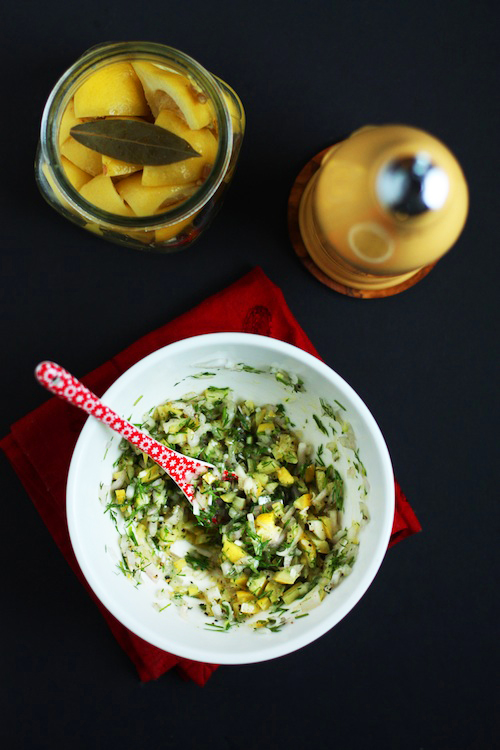
The briny flavor from the lemons is off-set by the fresh, sweet flavor of dill and the gentle bite of shallots. A generous amount of black pepper is added along with a healthy drizzle of olive oil. Stir it all together and you have something magnificent. Spoon it on top of freshly roasted salmon, then use it the next day as an appetizer by topping a cracker with your remaining salmon and a dollop of the relish. You could even use the relish as a topping for hummus.

Preserved Lemon Relish Appetizer

The relish is wonderful after sitting in the refrigerator overnight as the flavors have the opportunity to cuddle up with each other and really meld. But it is perfectly wonderful served moments after stirring everything together. If you don't want to make your own preserved lemons, you can buy them at specialty stores or online. But if you have the time, I recommend making your own at least once. It isn't complicated and the results are fantastic.

Lemons, Salt, Bay Leaves, Peppercorns

Preserved Lemon Relish

Recipe adapted from Simply Recipes

  • 1/2 cup chopped preserved lemon, flesh and seeds removed (recipe for preserved lemons below)
  • 1/4 cup fresh dill, chopped
  • 1/4 cup shallots, chopped
  • 2 tablespoons olive oil
  • Freshly ground black pepper

Combine all of the ingredients in a bowl and stir. That is all.

Preserved Lemons

I've read many recipes for preserved lemons and have taken all I learned from them to make this recipe. It's easy and has never turned out badly for me!

  • 6-8 small/medium sized lemons
  • 1/2 cup kosher salt
  • 1 tablespoon black peppercorns
  • 2 bay leaves

Begin by sterilizing your jar and washing the lemons well.

Cut the lemons in wedges by cutting them along the equator first, then cut each half in half again. Continue until you have 12 wedges from each lemon. Keep them in a large bowl at your work station.

Next, put 2 tablespoons of salt, a few peppercorns, and 1 bay leave in the bottom of the jar. Place a layer of lemon wedges on top of the salt. Now, put another 2 tablespoons of salt over the lemons, along with a few peppercorns but no bay leaf. Continue with another layer of lemons, then salt and peppercorns until the jar is filled. For the last layer, top the salt and peppercorns with another bay leaf.

Make sure to press down firmly on the lemons after each layer to release some of their juices. When you finish, the lemons should be covered in liquid. If they aren't, you can add a touch of water.

Put the lid on your jar and place it in the refrigerator where it will stay for the next 2-3 weeks or until the rinds have softened. For the first few days, turn the jar upside down and right side up to evenly distribute the salt and juices.

In Lunch & Dinner, Vegetarian, Cocktails and Appetizers
9 Comments
Smokey-Cheese-Crackers-from-Scratch.jpg
Smokey Cheese Crackers from Scratch

Smokey Homemade Cheese Crackers

Rachael White April 22, 2013

Do you remember eating cheese crackers as a kid? Or should I say cheeze crackers? Would that jog your memory? Opening that red cardboard box and tearing through the brown, waxy paper with dots of grease on it was something I enjoyed. Maybe a little too much. Cheese crackers were one of my favorite indulgences and one of the main reasons I put on a few extra pounds in junior high. Plus there were these huge, soft chocolate chip cookies in the cafeteria... These days, I rarely let myself eat things like that. Mostly because once I start, getting me to stop is like standing in front of a raging freight train; nearly impossible unless you’re a super hero. But I also avoid them because of simply not knowing what on earth is in there. What did they do to give them that radioactive orange glow? And why, oh why, are they so addicting?

Dough for Cheese Crackers

This recipe may not solve any cracker-addiction problem you may have, but at least we know exactly what has gone into them. And there is no greasy, waxy brown bag inside a cardboard box to worry with. The color comes from two things: cheese (duh), and smoked paprika. I had the urge to make a sweetly smokey flavored cracker and the paprika- smoked paprika- made that possible while also adding to the lovely color.

Poking Holes
Poking Holes

Brad and I were just talking the other day about how, when you visit a charming café on one of the side streets of Rome, it’s so nice when they bring a tiny bowl of salty potato chips. Not a massive, 2 bazillion calorie truck load of fried stuff that you might find here in the States. Just a small sampling to nibble on between sips of your Prosecco is all you need. These crackers would be perfect for just that purpose. They have so much flavor that you really don’t need handful after handful (although if that’s how you eat them I will not judge) and they pair beautifully with a nice, dry rosé, a bright, bubbly champagne, or a deep, dark Shiraz.

Making Cheese Crackers
Cracker Stealer
Cracker Stealer

For the past couple of years I’ve been talking about trying to make these, but without sufficient counter space or a working oven in our teeny tiny Tokyo kitchen, the cheesy crackers were put on the back burner. On the one hand, I’m kicking myself for not trying to make these sooner because they are so incredibly easy (um, 7 ingredients, people), while on the other hand I’m glad I waited. Because 2 years ago this wouldn’t have happened:

Moments like these are well worth the wait.

If you’ve been on the fence about trying to make your own crackers, I recommend taking the plunge. They are not at all difficult and the flavor is so much better- richer, deeper, cheesier- than the store-bought variety. And you don’t have to make them smokey if you don’t want to. Just omit the paprika if you prefer. I also think adding some fresh dill to the dough would make a nice, summery version perfect for parties and at-home happy hours.

Smokey Homemade Cheese Crackers

Recipe adapted from...wait for it... Tidy Mom who adapted it from In the Kitchen with Kath who adapted it from Smitten Kitchen ...Food bloggers UNITE!

  • 6 ounces Sharp Cheddar Cheese, shredded
  • 1/4 cup butter, room temperature and cut into cubes
  • 3/4 cup flour
  • 1/2 teaspoon salt
  • 1 teaspoon smoked paprika
  • 2 tablespoon whole milk milk*

Preheat oven to 350 degrees. In a food processor, combine the shredded cheese, butter, flour, salt and smoked paprika. Pulse about 12 times, 1 second for each pulse, until the mixture resembles wet sand. Add the milk and pulse until the dough sticks together when you press it between your fingers. If it is too dry, add a tiny bit of extra milk until you get a nice consistency.

Turn the dough out onto a floured surface and, using your clean hands, form it into a ball. Flatten the ball just slightly to form an oval. Now, use a rolling pin that has been lightly floured to roll the dough into a rectangle. Using a pizza cutter and a ruler to help with accuracy, cut the dough into 1 inch squares.

With the flat end of a wooden skewer, poke a hole in the center of each square. Using a large spatula, transfer the squares to a parchment lined baking sheet. Bake for 15-18 minutes or until the edges are just beginning to brown.*

Notes:

*The original recipe says to use 1 tablespoon, but I found my dough to be too dry with only 1. Start with 1 and add more if needed.

*I had to bake my crakers a little longer to get them as crispy as I wanted- nearly 20 minutes. Keep an eye on them and remember that as they cool they will become more crisp.

In Vegetarian, Cocktails and Appetizers
15 Comments
Charred-Brussels-Sprouts-1-copy2.jpg

Charred Brussels Sprouts + Pineapple

Rachael White April 1, 2013

Last night, I spent a few minutes scrolling through some old blog posts from our first couple years in Tokyo. Brad and I started The Whites in Tokyo almost immediately after moving to Japan and I'm so grateful that we did. I remember sitting in our tiny business-hotel room with two twin beds complete with buckwheat filled pillows, trying to get rid of the sticky heat that hung over the city in late August. Brad wrote the first few posts while I worked on swimming out of a haze of culture shock. Finally, on August 20, 2008, I wrote my first post about venturing out on my own. Reading that was fascinating to me because it is not unlike how I feel living in Denver.

Charred-Brussels-Sprouts-Ingredients.jpg

Reliving those early days of life in a new place helped remind me that I've come a long way since then. I owe a lot of my culinary knowledge to my time abroad because that was how I chose to get to know the culture. Prior to life in Tokyo, I never would have thought to put pineapple with brussels sprouts. But that's the beauty of experiencing new places domestic and abroad: the lessons we learn about food can follow us anywhere. While in Japan, I was able to travel to Thailand a couple of times and this recipe reminds me a little of the food I ate there. More because of the depth of flavor from the soy sauce, lemon and honey on the charred sprouts paired with the freshness of pineapple. That and the contrasting textures. All of these things remind me why I love Asian food. It is always so purposeful and never fails to unveil flavor combinations that linger in your mind long after you have swallowed each delicious bite.

Bowl-of-Brussels.jpg

Are you a brussels sprout hater? Get over it. You'll be glad you did. The sweet-salty sauce with the juicy, tart pineapple and crunchy almonds help take brussels sprouts to a new, exciting place far removed from the mushy, boring, flavorless land where they used to live. These would be great as a side dish to just about anything, but particularly dishes like grilled salmon or even with a burger as a healthier replacement for fries.

Charred-Brussels-Sprouts-with-Pineapple-11.jpg

Who knows? At this time next year I may be posting a brussels sprout recipe inspired by life in the Wild West! Life has thrown crazier curve balls my way...

Charred Brussels Sprouts with Pineapple & Almonds

Makes 4 servings

  • 3 1/2 cups or about 1 lb brussels sprouts
  • 1 cup diced fresh pineapple
  • 2 tablespoons peanut or olive oil
  • 1 tablespoon + 1 teaspoon honey
  • 1/2 teaspoon salt
  • 1/4 cup fresh lemon juice
  • 1 tablespoon soy sauce
  • 1/3 cup sliced almonds, toasted

Heat oven to 425 degrees and line a rimmed sheet pan with parchment paper.

Next, pull off any unattractive leaves from the brussels sprouts, then trim the ends and cut the brussels sprouts in half lengthwise. Place in a large bowl with the pineapple. Drizzle it all with peanut oil (olive oil also works) and sprinkle with a little salt and pepper. Toss to coat.

In a separate bowl, whisk together the oil, lemon juice, salt and honey. Set aside.

Spread the brussels sprouts and pineapple on your parchment lined sheet pan and place on the middle rack of the oven. Roast for 15-20 minutes or until the outer leaves and cut side are nicely charred and the centers are tender. Flip the brussels sprouts half way through cooking time to ensure even doneness.

When the sprouts are done and still hot on the baking sheet, drizzle with the soy sauce and honey mixture. Toss gently to coat, and transfer to a serving dish. Sprinkle with the almonds and serve immediately.

Variations:

  • Add crumbled bacon before serving
  • Add red pepper flakes to the soy sauce and honey mixture before coating the brussels sprouts
  • Use canned pineapple and add a bit of the juice after the brussels sprouts are done cooking
  • Use mandarin oranges in place of pineapple. Don't roast them with the brussels sprouts. Add them at the end.
In Vegetarian Tags brussels sprouts, pinapple, roasted brussels sprouts, soy sauce, vegetarian recipe
22 Comments
Roasted-Broccoli-Salad-with-Fresh-Mozz.jpg

Roasted Broccoli Salad

Rachael White March 18, 2013

Well, I have a basket full of laundry sitting on the sofa that needs to be folded. There are clean dishes on the counter that need to be put away. Taxes are due soon. And I could probably be checking several other items off of my to-do list. But here's the rub: the birds are chirping, the sun is shining, and it is warm outside. My to-do list just can't compete with that. And besides, it will all still be there in an hour or two, right?

Roasted-Broccoli-Salad.jpg

As a good Minnesota girl, I am a fan of snow (yes, even in March) but I'm not sure anyone can complain about t-shirt and sandals weather in early Spring. There is nothing that can compare to the feeling of vitamin D rejuvenating your entire body. Just as warmth in the beginning of Spring awakens the soul, a change in food can do the same. After a winter full of heavy food like stews, roasts, and countless baked goods, it feels nice to enjoy fresh, light food. Now, please understand that when I say "light" I don't mean so light that you're hungrier after you finish your meal than you were before it started. No. I'm not that kind of girl.

I need to feel satisfied, otherwise I start giving into things like handfuls of chocolate chips and scoops of peanut butter. Together. On a spoon. Ohmygosh.

Sorry- I got distracted.

Roasted-Broccoli.jpg

This roasted broccoli salad is absolutely perfect for a light but fulfilling lunch. It has tons of flavor, great textures, and it is pretty hands-off which makes it great for busy moms like me or even for working folks looking for an easy lunches to make ahead for the week.

If you're vegetarian, or even vegan if you remove or replace the mozzarella , this is a great meal option as well. The broccoli gives a nice meatiness and with some pine nuts or walnuts sprinkled on top, you've got a perfect entrée!

Roasted Broccoli & Fresh Mozzarella Salad

Serves 2 as a main course or 4 as a side dish

3 cups fresh broccoli florets

2 Tablespoons olive oil

1/2 teaspoon kosher salt

1/2 cup fresh mozzarella, cubed

Fresh lemon juice

1 teaspoon red pepper flakes

Preheat the oven to 425F.

In a large bowl, toss the broccoli with the olive oil and salt. Spread in an even layer on a baking sheet and place on the middle rack of the oven. Roast the broccoli for 10-12 minutes or until lightly browned and crispy in spots.

Put the broccoli in a serving bowl and drizzle with the lemon juice. Then top the salad with the mozzarella cubes and sprinkle with the red pepper flakes. Season with additional salt if necessary. Serve immediately.

* If you would like to make this ahead, allow the broccoli to cool before adding the cheese. Then, store the salad in the refrigerator and eat cold- it's just as delicious!

In Vegetarian Tags broccoli salad, easy lunch recipe, fresh mozzarella, healthy, roasted broccoli recipe, roasted broccoli salad, vegetarian
7 Comments
← Newer

Search Posts


Featured Posts

Summary Block
This is example content. Double-click here and select a page to feature its content. Learn more
Featured
Mar 19, 2026
Cursus Amet
Mar 19, 2026
Mar 19, 2026
Mar 12, 2026
Pellentesque Risus Ridiculus
Mar 12, 2026
Mar 12, 2026
Mar 5, 2026
Porta
Mar 5, 2026
Mar 5, 2026
Feb 26, 2026
Etiam Ultricies
Feb 26, 2026
Feb 26, 2026
Feb 19, 2026
Vulputate Commodo Ligula
Feb 19, 2026
Feb 19, 2026
Feb 12, 2026
Elit Condimentum
Feb 12, 2026
Feb 12, 2026
Feb 5, 2026
Aenean eu leo Quam
Feb 5, 2026
Feb 5, 2026
Jan 29, 2026
Cursus Amet
Jan 29, 2026
Jan 29, 2026
Jan 22, 2026
Pellentesque Risus Ridiculus
Jan 22, 2026
Jan 22, 2026
Jan 15, 2026
Porta
Jan 15, 2026
Jan 15, 2026

Powered by Squarespace