Quantcast
  • Contact
  • Portfolio
  • Subscribe
  • Recipes
Menu

Set the Table Photography

photography
  • Contact
  • Portfolio
  • Subscribe
  • Recipes
×
Pineapple-Margarita.jpg
Pineapple Margarita

Cocktail Friday: Pineapple + Honey Margarita

Rachael White May 3, 2013

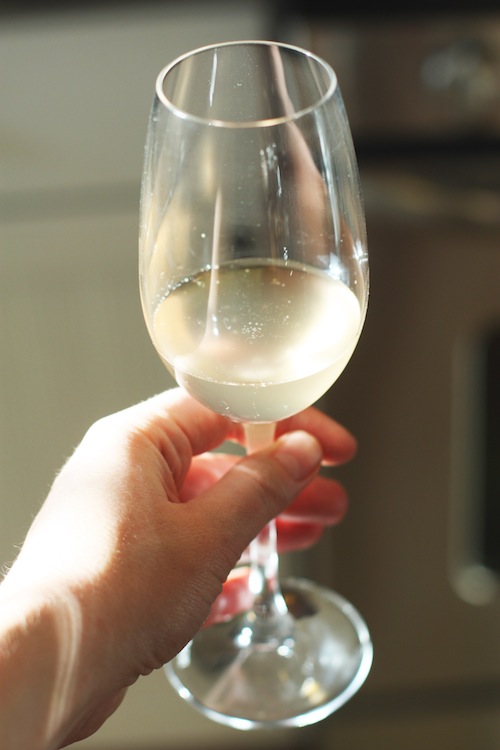
What a week. Did your week feel as completely crazy as mine? Keeping track of a very busy toddler who has learned to climb on the furniture and go on a nap strike in the same week has my head spinning. However, as I write this, life is quite peaceful. I'm sitting at my dining room table and, despite the snow that fell yesterday, the sun is spilling through the west-facing French doors, giving the whole room a beautiful glow. Dinner is in the oven and I'm listening to a radio station on Spotify based on Blossom Dearie. Glass of Sauvignon Blanc next to me. Riley and Brad playing in the other room. The dog curled up at my feet. This is my favorite time of day. It makes me feel refreshed, which I often need by early evening.

Pineapple Top
Pineapple Top

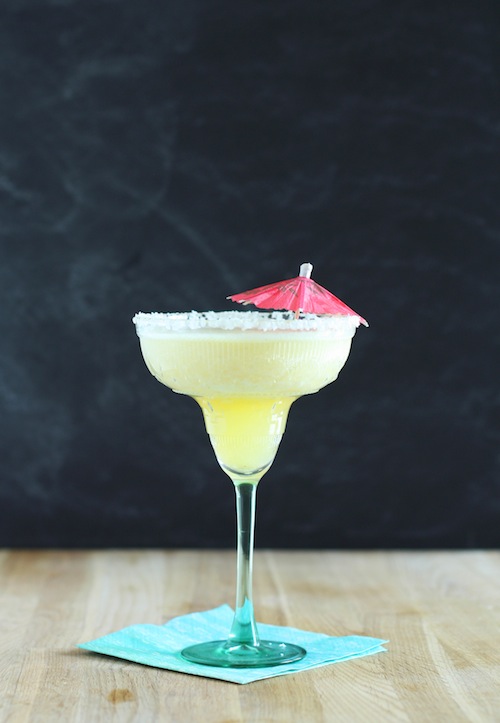
While I love the wine that I'm drinking (Stratum Sauvignon Blanc...you can find this and a whole list of my favorites under $20 by clicking here), I would love to be sipping one of these delicious pineapple and honey margaritas right now. The tart sweetness of the pineapple makes for a mellow, tropical take on the typically citrus-based margarita. I love a good, classic margarita, but it's fun to play around a little, don't you think? And pineapple makes everyone think of a sandy beach in Hawaii. Can't complain about that, can you?

Pineapple
Pineapple

Did you know that pineapples are in season right now? Yep. This is the time! My favorite way to eat pineapple is the Thai way: sprinkled with sugar and red pepper flakes. It's absolutely fabulous. Now I'm thinking about how great that little hint of spice would be in this margarita. You should do that. Add just a few red pepper flakes and blend those in. For real. If you aren't brave enough to add a little spicy kick, that's fine. This pineapple margarita is anything but boring and will get you in the Cinco de Mayo spirit in no time. I did add some lime juice, just to make it more margarita-y. Yep. That's a word. On Fridays, words like that are allowed.

Pineapple Margarita Recipe

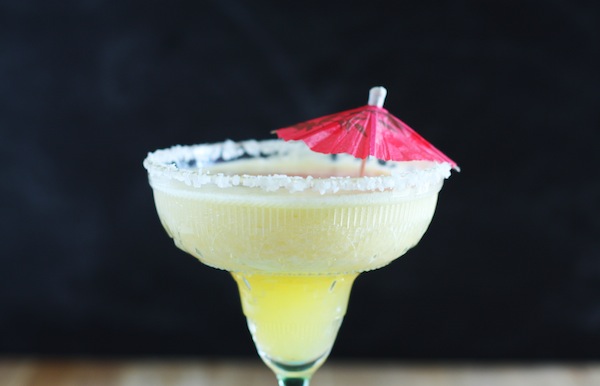
Do you know what else is allowed on Fridays? Umbrellas in your cocktail. A little tacky? Sometimes. But mostly they are just awesome.

Cheers to the weekend!

Pineapple Margaritas

Makes 2 margaritas

  • 2 cups fresh pineapple, cut into pieces
  • 4 oz. silver tequila
  • 2 teaspoons honey
  • 1/4 cup lime juice
  • Margarita salt

Rub a little of the lime juice on the rim of each glass. Turn the glass upside down in the salt to coat the rim.

Combine 1 cup of crushed ice with the pineapple, tequila, honey and lime juice in a blender. Blend until smooth. Pour into prepared margarita glasses and garnish with an umbrella. Just do it. You won't regret it.

In Cocktails and Appetizers
8 Comments
Miso Ice Cream Pies
Miso Ice Cream Pies

Dinner Parties + Miso Ice Cream Pies

Rachael White May 1, 2013

With images of a warm, summery weekend still in the back of my mind and the remains of a little sun burn on my shoulders, I’m trying to wrap my head around what is happening outside right now. It’s snowing. Big fat flakes that are piling up fast. It’s May 1st and we are expecting somewhere between 5 and 10 inches. Personally, I love it but I am worried about the light blue bird egg that recently appeared in one of my hanging baskets. I didn’t bring it inside because I want to make sure the birds continue to take care of the little egg. Here’s hoping both the egg and the plant survive...

Over the weekend, not only were we able to enjoy some pretty amazing weather, we also brought out some of our treasures from life in Japan that we have been saving for a dinner party. We had collected some fun stuff for hosting a Japanese dinner party and hadn’t had the chance to break them out until now. It was time. We have an antique kimono panel that we use as a table runner:

Table Settings
Table Settings

And little Dachshund-shaped chopstick holders that were handmade in Kyoto...

Chopstick Dogs
Chopstick Dogs
Place setting
Place setting

And we hung lights outside, even though it was a bit cool once it got dark to sit outside. Still, the glow added a nice, festive feel to the evening.

Party Lights
Party Lights

When it comes right down to it, the table was a bit eclectic between the dishes and decorations, but that is actually quite fitting for a Japanese-inspired table. Often times, dining out involves many small dishes piling up at the table. If you’re dining in a really small, traditional izakaya, those dishes often do not match. But there is an endearing quality to all the different patterns and shapes that litter the table top as you devour skewers of yakitori, plates of gyoza, and glasses of Kirin beer.

For our dinner party this weekend, I served my favorite Japanese-inspired dishes to 8 diners. We began the evening by making a toast with sparkling saké and nibbled on edamame crostini flavored with lemon and mint...

Edamame Crostini
Edamame Crostini

Next, we enjoyed the lovely, mild flavor of scallop and corn gyoza with spicy sriracha sauce. Match made in heaven.

Scallop-Corn-Gyoza
Scallop-Corn-Gyoza

Then moved on to perfectly grilled (by Brad) chicken yakitoriwith a fresh, flavorful yet light Asian slaw...

Chicken-Yakitori
Chicken-Yakitori

Roasted salmon with miso butter and peas (apologies for the iPhone photo- I posted this on Instagram)...

Salmon with Miso Butter

And finally, a dessert with some umami, miso ice cream served on top of brownies. My original idea was to make mini ice cream pies, but after making the first 4 pies, my crust crumbled like sand when I tried removing it from the mini molds. So, I made an emergency batch of brownies and topped it with a scoop of brown sugar miso ice cream. If you haven’t tried this recipe that I posted on Tokyo Terrace a while back, you really must. It is the most lovely ice cream- different enough to mix up your usual ice cream routine without being totally weird. Sweet, white miso is my favorite, but you could experience with other shades of miso as well.

We enjoyed the 4 successful mini ice cream pies last night with Brad's parents. They were wonderful and will definitely become a frequent rotation in my entertaining repertoire.

Ice Cream Pies
Ice Cream Pies

I won’t post the recipe I originally used for the chocolate cookie crust, since it obviously did not work very well for me. But here is another one from Food & Wine that I have had a lot of success with in the past. I’d stick with that.

The crisp chocolate crust with the creamy ice cream and rich whipped cream make a decadent, elegant dessert with layers of subtle flavor that guests will love. I especially love that you can make this in advance. Just assemble the pies, place on a cookie sheet and wrap well with plastic wrap before putting them in the freezer. They will last about 3 or 4 days this way. And if you aren’t interested in making your own ice cream, find your favorite store-bought flavor and use that in place of the miso ice cream in this recipe. Strawberry, salted-caramel, mint chocolate chip...they would all work beautifully!

What are you favorite dinner party recipes? I'd love to hear what you all make for company!

Mini Miso Ice Cream Pies

Makes 4 individual pies using 4-inch molds, a or one 8-inch or 9-inch pie or tart

1 quart brown sugar miso ice cream (click here for recipe), chilled in the freezer and then softened so it can be easily spooned into the crust

1 recipe chocolate cookie crust (click here for recipe)

1 cup heavy whipping cream

1 tablespoon sugar

1/2 teaspoon vanilla extract

Begin my making the crust. Once it has chilled, spoon the ice cream evenly into the 4 mini crusts, or your one larger crust. Place the pies on a cookie sheet and put them in the freezer for about 3 hours. If you are going to wait a few days to serve them, wrap them in plastic wrap after the 3 hours and leave them in the freezer until you are ready to serve them.

Before serving, place the whipping cream in a medium bowl or the bowl of an electric mixer. Mix on medium high speed until the cream begins to thicken. Add the sugar and vanilla and continue to mix until soft peaks form. Spread a spoon full or two on each pie. Serve immediately.

In Dessert, Lunch & Dinner, Cocktails and Appetizers
6 Comments
Raspberry-Thyme Sorbet

Raspberry-Thyme Sorbet (no ice-cream maker needed!)

Rachael White April 29, 2013

I started planting some seeds yesterday. Nothing crazy- just green onions, radishes, sweet yellow onions, and a bunch of herbs. I have never grown anything from seed before. How many of you start your gardens from seed? It's definitely another exercise in patience, not that I need any more practice in that area with a toddler running around. I also planted some herbs in a window box that are not from seed. They are too small to harvest anything from just yet, but I needed something that gave more immediate satisfaction. They are also a backup in case my seedlings don't work out. Plus, seeing the tender leaves stretch towards the sun is a beautiful thing. Why should we wait for that? I think we all love to feel the warmth of the sun the same way little plants do.

Box of Herbs
Box of Herbs

Herbs are fun to play with in the kitchen. There are so many things you can do with sweet basil, earthy sage, and grassy parsley. Have you tried adding herbs to sorbet? Match made in heaven. This raspberry-thyme sorbet is a great example of something easy and elegant that you can serve at the end of a spring dinner party. Or, if you're like me, you can have a scoop at the end of a regular day as a healthy treat. And good news- you don't need an ice-cream maker!

Raspberry & Thyme Sorbet

Thyme simple syrup adds the perfect amount of herbal flavor to the bright raspberries. In mere minutes, this sorbet comes together in the food processor and after about an hour or 2 in the freezer, it is ready to serve! Since I made this sorbet, I've been thinking of other great ways to take advantage of the lovely flavor and color of this icy treat. Put a scoop in a champagne glass and top with some Prosecco? Yes, please! Or perhaps layer it with some dark chocolate cake or chocolate gelato in a loaf pan and freeze it all together for a stunning, rich dessert.

Whatever you decide to do with this sorbet, I know you'll love it. Now that the weather has begun to show signs of an actual spring for many of us, this is the perfect time to try it out!

Raspberry-Thyme Sorbet

Makes 1 quart

  • 4 cups frozen raspberries
  • 1/2 cup thyme simple syrup, cooled (recipe below)

In the bowl of a food processor, add the raspberries and cooled simple syrup. Run the food process for 2 or 3 minutes or until the raspberries have transformed into a smooth, creamy mixture. Transfer to a container with a lid and place in the freezer for about 2 hours or until the sorbet is firm. Serve with a sprig of thyme as a garnish, if you'd like.

Thyme Simple Syrup

  • 1 cup water
  • 1 cup sugar
  • 1/4 cup thyme sprigs (you can mostly estimate the amount here, but just loosely pack the thyme sprigs in the 1/4 cup measure if you want)

Combine the water and sugar in a small saucepan over medium-high heat. When the sugar just begins to dissolve, add the thyme. Bring to a gentle simmer and allow to cook for about 2 minutes. Turn off the heat and let the syrup cool for about 10 minutes before straining it into a jar or lidded container. Cool completely before covering and store in the fridge until ready to use.

*Note: If you have leftover syrup, save it to mix into a cocktail, mocktail, or iced tea.

In Dessert, Vegetarian
9 Comments
Preserved Lemon Relish

Preserved Lemon Relish

Rachael White April 24, 2013

The first time I made preserved lemons was in the tiny kitchen of our second Tokyo apartment. In the end, we lived in three separate apartments during our 4 years in Japan. I had a particular fondness of the kitchen in the second apartment because in the afternoon and early evening sunlight poured through the windows. There is something about the time between 3 and 7 that I just love. The light is simultaneously soft and bright, bringing a little something special to what can sometimes be the hardest time of day. I may not have had any counter space to speak of, but at least I had light. Fair trade, if you ask me.

Preserved Lemon Relish Ingredients

As I packed lemon wedges into a jar during this maiden voyage to the land of preserved lemons, I remember wondering what on earth I would do with them when the salt had sufficiently infused the rinds, making them soft and salty. Somehow, I managed to use most of them in meals for one because Brad didn't care for them. I also found that I enjoyed them in homemade hummus, which helped to use up a few at a time. But this preserved lemon relish, which I only discovered a short time ago, is the ideal way to utilize this unique Moroccan ingredient. And I should mention that Brad loved this relish! Thank goodness.

Preserved_Lemons
Preserved_Lemons

The briny flavor from the lemons is off-set by the fresh, sweet flavor of dill and the gentle bite of shallots. A generous amount of black pepper is added along with a healthy drizzle of olive oil. Stir it all together and you have something magnificent. Spoon it on top of freshly roasted salmon, then use it the next day as an appetizer by topping a cracker with your remaining salmon and a dollop of the relish. You could even use the relish as a topping for hummus.

Preserved Lemon Relish Appetizer

The relish is wonderful after sitting in the refrigerator overnight as the flavors have the opportunity to cuddle up with each other and really meld. But it is perfectly wonderful served moments after stirring everything together. If you don't want to make your own preserved lemons, you can buy them at specialty stores or online. But if you have the time, I recommend making your own at least once. It isn't complicated and the results are fantastic.

Lemons, Salt, Bay Leaves, Peppercorns

Preserved Lemon Relish

Recipe adapted from Simply Recipes

  • 1/2 cup chopped preserved lemon, flesh and seeds removed (recipe for preserved lemons below)
  • 1/4 cup fresh dill, chopped
  • 1/4 cup shallots, chopped
  • 2 tablespoons olive oil
  • Freshly ground black pepper

Combine all of the ingredients in a bowl and stir. That is all.

Preserved Lemons

I've read many recipes for preserved lemons and have taken all I learned from them to make this recipe. It's easy and has never turned out badly for me!

  • 6-8 small/medium sized lemons
  • 1/2 cup kosher salt
  • 1 tablespoon black peppercorns
  • 2 bay leaves

Begin by sterilizing your jar and washing the lemons well.

Cut the lemons in wedges by cutting them along the equator first, then cut each half in half again. Continue until you have 12 wedges from each lemon. Keep them in a large bowl at your work station.

Next, put 2 tablespoons of salt, a few peppercorns, and 1 bay leave in the bottom of the jar. Place a layer of lemon wedges on top of the salt. Now, put another 2 tablespoons of salt over the lemons, along with a few peppercorns but no bay leaf. Continue with another layer of lemons, then salt and peppercorns until the jar is filled. For the last layer, top the salt and peppercorns with another bay leaf.

Make sure to press down firmly on the lemons after each layer to release some of their juices. When you finish, the lemons should be covered in liquid. If they aren't, you can add a touch of water.

Put the lid on your jar and place it in the refrigerator where it will stay for the next 2-3 weeks or until the rinds have softened. For the first few days, turn the jar upside down and right side up to evenly distribute the salt and juices.

In Lunch & Dinner, Vegetarian, Cocktails and Appetizers
9 Comments
Blackberry-Vanilla-Cocktail.jpg
Blackberry Vanilla Cocktail

Blackberry Vanilla Mocktail

Rachael White April 23, 2013

Just popping by to let you know about this delicious mocktail that I made for my guest post over on La Fuji Mama! Click here to check out the recipe and more pictures!

In Cocktails and Appetizers
Comment
Smokey-Cheese-Crackers-from-Scratch.jpg
Smokey Cheese Crackers from Scratch

Smokey Homemade Cheese Crackers

Rachael White April 22, 2013

Do you remember eating cheese crackers as a kid? Or should I say cheeze crackers? Would that jog your memory? Opening that red cardboard box and tearing through the brown, waxy paper with dots of grease on it was something I enjoyed. Maybe a little too much. Cheese crackers were one of my favorite indulgences and one of the main reasons I put on a few extra pounds in junior high. Plus there were these huge, soft chocolate chip cookies in the cafeteria... These days, I rarely let myself eat things like that. Mostly because once I start, getting me to stop is like standing in front of a raging freight train; nearly impossible unless you’re a super hero. But I also avoid them because of simply not knowing what on earth is in there. What did they do to give them that radioactive orange glow? And why, oh why, are they so addicting?

Dough for Cheese Crackers

This recipe may not solve any cracker-addiction problem you may have, but at least we know exactly what has gone into them. And there is no greasy, waxy brown bag inside a cardboard box to worry with. The color comes from two things: cheese (duh), and smoked paprika. I had the urge to make a sweetly smokey flavored cracker and the paprika- smoked paprika- made that possible while also adding to the lovely color.

Poking Holes
Poking Holes

Brad and I were just talking the other day about how, when you visit a charming café on one of the side streets of Rome, it’s so nice when they bring a tiny bowl of salty potato chips. Not a massive, 2 bazillion calorie truck load of fried stuff that you might find here in the States. Just a small sampling to nibble on between sips of your Prosecco is all you need. These crackers would be perfect for just that purpose. They have so much flavor that you really don’t need handful after handful (although if that’s how you eat them I will not judge) and they pair beautifully with a nice, dry rosé, a bright, bubbly champagne, or a deep, dark Shiraz.

Making Cheese Crackers
Cracker Stealer
Cracker Stealer

For the past couple of years I’ve been talking about trying to make these, but without sufficient counter space or a working oven in our teeny tiny Tokyo kitchen, the cheesy crackers were put on the back burner. On the one hand, I’m kicking myself for not trying to make these sooner because they are so incredibly easy (um, 7 ingredients, people), while on the other hand I’m glad I waited. Because 2 years ago this wouldn’t have happened:

Moments like these are well worth the wait.

If you’ve been on the fence about trying to make your own crackers, I recommend taking the plunge. They are not at all difficult and the flavor is so much better- richer, deeper, cheesier- than the store-bought variety. And you don’t have to make them smokey if you don’t want to. Just omit the paprika if you prefer. I also think adding some fresh dill to the dough would make a nice, summery version perfect for parties and at-home happy hours.

Smokey Homemade Cheese Crackers

Recipe adapted from...wait for it... Tidy Mom who adapted it from In the Kitchen with Kath who adapted it from Smitten Kitchen ...Food bloggers UNITE!

  • 6 ounces Sharp Cheddar Cheese, shredded
  • 1/4 cup butter, room temperature and cut into cubes
  • 3/4 cup flour
  • 1/2 teaspoon salt
  • 1 teaspoon smoked paprika
  • 2 tablespoon whole milk milk*

Preheat oven to 350 degrees. In a food processor, combine the shredded cheese, butter, flour, salt and smoked paprika. Pulse about 12 times, 1 second for each pulse, until the mixture resembles wet sand. Add the milk and pulse until the dough sticks together when you press it between your fingers. If it is too dry, add a tiny bit of extra milk until you get a nice consistency.

Turn the dough out onto a floured surface and, using your clean hands, form it into a ball. Flatten the ball just slightly to form an oval. Now, use a rolling pin that has been lightly floured to roll the dough into a rectangle. Using a pizza cutter and a ruler to help with accuracy, cut the dough into 1 inch squares.

With the flat end of a wooden skewer, poke a hole in the center of each square. Using a large spatula, transfer the squares to a parchment lined baking sheet. Bake for 15-18 minutes or until the edges are just beginning to brown.*

Notes:

*The original recipe says to use 1 tablespoon, but I found my dough to be too dry with only 1. Start with 1 and add more if needed.

*I had to bake my crakers a little longer to get them as crispy as I wanted- nearly 20 minutes. Keep an eye on them and remember that as they cool they will become more crisp.

In Vegetarian, Cocktails and Appetizers
15 Comments
← NewerOlder →

Search Posts


Featured Posts

Summary Block
This is example content. Double-click here and select a page to feature its content. Learn more
Featured
Nov 12, 2025
Cursus Amet
Nov 12, 2025
Nov 12, 2025
Nov 5, 2025
Pellentesque Risus Ridiculus
Nov 5, 2025
Nov 5, 2025
Oct 29, 2025
Porta
Oct 29, 2025
Oct 29, 2025
Oct 22, 2025
Etiam Ultricies
Oct 22, 2025
Oct 22, 2025
Oct 15, 2025
Vulputate Commodo Ligula
Oct 15, 2025
Oct 15, 2025
Oct 8, 2025
Elit Condimentum
Oct 8, 2025
Oct 8, 2025
Oct 1, 2025
Aenean eu leo Quam
Oct 1, 2025
Oct 1, 2025
Sep 24, 2025
Cursus Amet
Sep 24, 2025
Sep 24, 2025
Sep 17, 2025
Pellentesque Risus Ridiculus
Sep 17, 2025
Sep 17, 2025
Sep 10, 2025
Porta
Sep 10, 2025
Sep 10, 2025

Powered by Squarespace