Quantcast
  • Contact
  • Portfolio
  • Subscribe
  • Recipes
Menu

Set the Table Photography

photography
  • Contact
  • Portfolio
  • Subscribe
  • Recipes
×
Rebecca's Gazpacho
Rebecca's Gazpacho

Rebecca's Gazpacho Recipe

Rachael White June 26, 2013

My sister eats salsa straight from the jar. For dinner. It's impressive, really. She doesn't even need tortilla chips whereas I must have a salty, crunchy vehicle for most condiments. It's no surprise, given her love for salsa, that Rebecca has a fabulous gazpacho recipe under her belt. The first time I made gazpacho was using her recipe last summer. Before then, I had never really thought about this cold, vegetable packed soup. I had been missing out. Big time.

Vegetables for Gazpacho

Gazpacho is perfect for people like me who go crazy at farmers markets and end up with more produce than time to eat it. Yes, gazpacho is the answer for people like me. It's versatile, requires zero heat from the oven or stove (a priceless advantage when temps are in the upper 90's) and it is insanely healthy. The vegetables in the photo above are what I used to make my most recent batch, which deviates a bit from Rebecca's usual recipe but only slightly: orange bell peppers, baby cucumbers, a leek, and a can of San Marzano tomatoes because that's what we had on hand.

Gazpacho for Summer
Gazpacho for Summer

This is a great recipe to have on hand for CSA folks too and is the perfect way to utilize the delicious, fresh tomatoes mid to late summer. I often hear from people wondering what to do with the plethora of vegetables they receive every week and this is a refreshing solution. Using Rebecca's recipe as a guide, I like to make variations based on what I have in my refrigerator. Even though I used canned tomatoes this time around, it is best with fresh.

Veggies for Gazpacho

As if you needed another reason to try making gazpacho, keep in mind that it gets better as it sits. If you make it on Monday and have it for lunch throughout the week, it will just get better with each passing day. Did I mention that it takes less than 20 minutes to make? True story.

Rebecca’s Gazpacho


My variation of Rebecca's recipe used a 24 oz. can of San Marzano tomatoes in place of the 3 large tomatoes and the tomato juice, orange bell peppers rather than red, and a leek in place of the onion. I also omitted the tomato juice and used the juice from the can of tomatoes. If you use canned tomatoes, you may still want to add a bit of tomato juice to thin out the gazpacho.

Ingredients

  • 3 large tomatoes
  • 2 cucumbers
  • 1 onion
  • 2 red bell peppers (orange work well too)
  • ¼ cup parsley, curly or flat leaf
  • 5 Cups Low-Sodium Tomato Juice
  • 1/3 cup vinegar
  • Sriracha, to taste
  • Salt + Pepper, to taste

Instructions

  1. Roughly chop all of the vegetables.
  2. Place them in the food processor and pulse a few times but don't completely purée yet.
  3. Add the tomato juice, vinegar, Sriracha, salt and pepper and purée until smooth.
  4. Serve cold topped with feta cheese, grilled shrimp, croutons, or nothing at all.
In Lunch & Dinner, Vegetarian Tags gazpacho recipe, how to use up vegetables, summer soup recipe, vegetables, vegetarian
1 Comment
Peanut Butter Banana Smoothie

Peanut Butter + Banana Smoothie

Rachael White June 24, 2013

Last night we experienced a string of thunderstorms that brought much needed rain, loud, booming thunder, and lightning that jumped from cloud to cloud. Living in Japan, we didn't experience too many thunderstorms. We got plenty of rain, but real thunderstorms didn't happen often. Now that we live in Denver, I still find myself missing those classic sounds of a good summer storm. There is just nothing like it. It's like red lipstick. Or peanut butter and banana. It never gets old.

I may not be able to create thunderstorms whenever I get a craving for one, but I can make a peanut butter and banana smoothie any time. No, it isn't quite as exciting as a thunderstorm, but it's the best I can do.

Riley loves these smoothies almost as much as his Kale & Pineapple smoothies. This is good news because some days it seems like Riley is on a hunger strike. He won't eat anything and then I start to feel like a bad mom because the only thing that has gone into his stomach is milk and Cheerios. On those days, smoothies are a life saver. I love this one because it has lots of protein, which is important for little growing bodies like his. Plus, we almost always have all the ingredients available. Not always the case with other smoothie concoctions.

How can you look at this face and not know that he loves every bit of this peanut butter banana goodness?

Smoothie Smiles
Smoothie Smiles

And then there are days when I don't have the time or energy to make a proper meal for myself. On those days, mommy gets the smoothies too.

I didn't add honey or any additional sweeteners to my recipe here because I don't feel like it is necessary. I try to stay away from adding sugar to things unless it makes or breaks the recipe. However, if you want to you can add honey.

Peanut Butter Banana Smoothie with Wheat Germ

Peanut Butter + Banana Smoothie

Yield: Makes 2 smoothies

Ingredients

  • 1 cup almond milk, unsweetened
  • 2 tablespoons natural peanut butter (I use Jiff Natural PB)
  • 1 banana
  • 2 tablespoons wheat germ
  • 1 cup ice

Instructions

  1. Combine all ingredients in a blender. Blend until smooth and serve.
In Breakfast & Brunch, Vegetarian
8 Comments
Thai-Iced-Coffee-from-Set-the-Table.jpg

Cocktail Friday: Thai Iced Coffee

Rachael White June 21, 2013

I'm not sure why, but Thailand has been on my mind a lot lately. I thought posting the Sweet & Spicy Thai Pineapple Cocktail would be enough to get it out of my system but I was wrong. Some places just stick with you I guess. Like sweetened condensed milk to a spoon. Get it?

Iced-Coffee.jpg

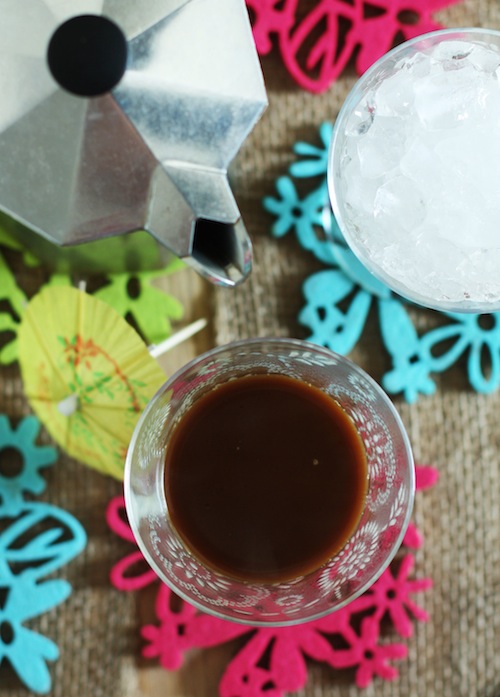
When we arrived in Bangkok, I remember being totally shocked at the overwhelming heat and humidity. This combined with a little dose of jet lag made me ache for coffee. Of course, I couldn't stand the thought of hot coffee since I felt like I was melting right there on the pavement in the middle of Bangkok. It wasn't until the morning after we arrived that I was finally able to indulge in a big, cold glass of iced coffee. At the time, I knew nothing about Thai or Vietnamese-style iced coffee so I was surprised when I saw sweetened condensed milk going into my glass. Honestly, I was pretty disappointed and sure that I would hate it. I'm usually a straight up coffee with milk kind of gal. No sugar in my coffee thankyouverymuch.

How-to-Make-Thai-Iced-Coffee.jpg

I was pleasantly surprised when I took the first sip. The sweetened condensed milk actually had a nice, gentle sweetness that tasted different than adding regular sugar. I'm not sure exactly what it is, but the flavor of strong coffee at that moment was the most perfect combination. The only other time I remember being so happy to have a cup of coffee in my hands was in Argentina when I first tried café con crema. It was dreamy. But I'll save that story for another day.

Thai-Iced-Coffee-with-Umbrella.jpg

Sweetened condensed milk always makes me think of Thailand because there were cans stacked at many of the food carts. My guess is because it comes in a can, giving it the ability to withstand the heat without spoiling, it just makes more sense than regular milk. Whatever the reason, I'm glad they made the connection. This drink is the perfect way to welcome the first official day of summer (TODAY!) while reading a good book in the shade. As you can tell by my photos, it's already hot here in Denver. Hello, condensation!

You can make this a cocktail by adding a shot of vodka. Vanilla vodka would also be tasty if you have more of a sweet tooth, but I like to keep it simple with straight up vodka. And you can of course keep this virgin by not adding any alcohol. Versatile and delicious!

Thai Iced Coffee

Ingredients

  • 1/2 cup very strong coffee
  • 1-2 tablespoons sweetened condensed milk
  • 2 oz vodka (optional)

Instructions

  1. In a glass (not the one you will be drinking out of) combine the sweetened condensed milk with the coffee and vodka (if using). Stir until the milk is completely incorporated into the coffee. Fill your serving glass with crushed ice and add your coffee. Garnish with a cocktail umbrella (you'll be happy you did- they are just so fun, especially on Fridays) and enjoy!
In Dessert, Cocktails and Appetizers
Comment
Melon & Prosciutto Flatbread

Melon + Prosciutto Flatbread with Arugula + Goat Cheese

Rachael White June 19, 2013

Riley has started this funny habit of running around the dining room table over and over again. He doesn't make any noises like you might expect a toddler to do while going in circles. Instead, there is only the sound of his little feet hitting the wood floor with a soft, muted sound that I hope never escapes my memory when he is six feet tall and no longer my little baby. I fear that day will come much faster than I'm prepared for, so I'm trying to soak up every goofy, sweet little moment I get with him.

Flatbread dough
Flatbread dough

Here's the thing: watching Riley run around in circles is adorable. Watching me run around in circles is not. When we have little gatherings at our house, I sometimes feel like all I'm doing is running around like crazy trying to make sure food is ready, drinks are poured, etc. In order to minimize the craziness, I've been trying to find things that I can serve to guests that aren't terribly time consuming but is still beautiful and full of flavor. This flatbread with prosciutto, melon, arugula and goat cheese is one examle of how something simple and classic can be stunning and party-worthy.

Melon, Prosciutto, Arugula

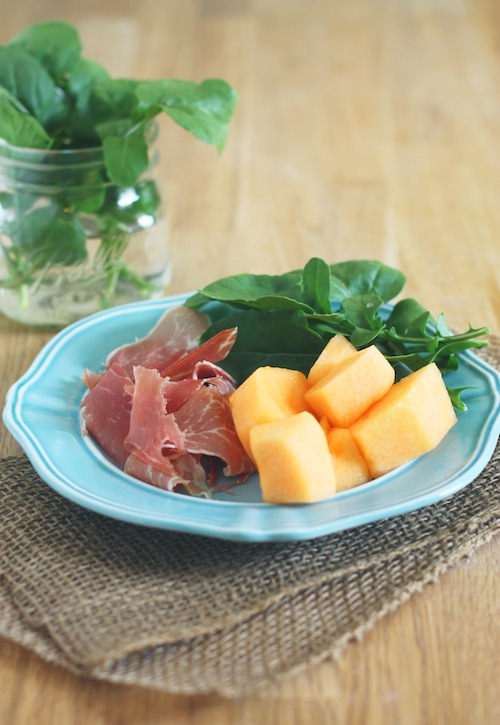
The classic combination of melon and prosciutto is perfect for this time of year. It is light, sweet and salty, with a beautiful, summery appearance that dresses up any party spread. Transferring these flavors to flatbread, which is perfect for eating with cocktails, becomes even better with some peppery arugula and tangy goat cheese.

Full disclosure: I usually use store-bought pizza dough rather than making my own. A lot of grocery stores are selling pizza dough that is ready to pop in the oven with whatever toppings you like. They taste great and save quite a bit of time and stress, especially if you are entertaining. If you are extra ambitious, go ahead and make your own pizza dough. I'm always up for going 100% homemade. Well, almost always.

Healthy dose of olive oil

The dough is drizzled with a healthy amount of olive oil and sprinkled with sea salt. When it comes out of the oven, it has a light golden color with the perfect chewy-crunchy texture. Then, the melon, prosciutto, arugula and goat cheese are arranged on top with a little bit of freshly ground black pepper and one last light drizzle of olive oil to add a nice sheen.

Melon and Prosciutto Flatbread

And that's that! You're all set to serve this up to your guests with a lovely glass of prosecco. No need to run around in circles.

Melon + Prosciutto Flatbread with Arugula + Goat Cheese


  • Pizza dough, store bought or homemade
  • 2-3 tablespoons good olive oil
  • sea salt or course salt
  • Cornmeal for dusting
  • 1 cup fresh cantaloupe, peeled, sliced and cut into 1 inch pieces
  • 1/2 cup loosely packed arugula leaves
  • 4 oz goat cheese
  • Freshly ground black pepper
  1. Preheat the oven to 425 degrees.
  2. On a lightly floured work surface, roll or pat the dough out to fit a medium/large rimmed baking sheet. Sprinkle the baking sheet with a thin, even layer of cornmeal to keep the crust crispy and to keep it from sticking. Transfer the dough to your baking sheet and poke some holes in the dough with a fork to keep it from bubbling up too much during baking.
  3. Drizzle with the olive oil, sprinkle with a little salt, and bake for 10-12 minutes or until the crust is golden brown. Remove from the oven and let cool for a couple minutes.
  4. Arrange the melon, arugula, prosciutto and goat cheese on top of the crust. Sprinkle with freshly ground black pepper and drizzle with a little olive oil. Cut and serve.
In Breakfast & Brunch, Lunch & Dinner, Vegetarian, Cocktails and Appetizers
4 Comments

Homemade Furikake

Rachael White June 17, 2013

I’m a condiment person. Dips, salsas, sauces...you name it, I probably love it. When I was a kid, it was not difficult to find me at parties because I was most likely lurking near the chips and dip. OK, let’s be honest...that’s usually where you’ll find me as a grown-up, too. Chips and fries are just vehicles for salsa and ketchup, right?

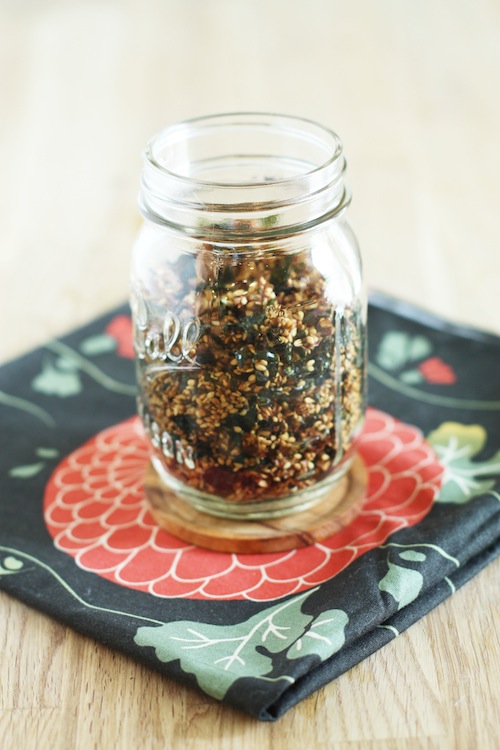
When we lived in Japan, I got hooked on furikake, a combination of sesame seeds, nori, and other seasonings that is sprinkled on rice and other foods for added flavor. For the first 3 years of life in Tokyo, I used furikake liberally. Then, I got pregnant with Riley and like many first-time mothers I obsessively read every ingredient label on everything I put into my body. When I saw MSG as one of the main ingredients in furikake, it immediately exited my list of pregnancy-friendly foods.

Recipe for Homemade Furikake

This was difficult. Mostly because I was craving Japanese sticky rice like no one’s business and all I wanted to do was put some salty, crunchy, umami-flavored furikake on top. The thought of making my own crossed my mind, but I was pretty busy growing a human being and didn’t have the energy to think about making something that I was sure would be equally as difficult. I had visions in my mind of drying salmon skin in the oven and other “complicated” steps that must go into making such a flavorful mixture. Turns out, furikake is not at all difficult to make.

Homemade Furikake
Homemade Furikake

Here’s the basic recipe that I’ve found to work quite well (no MSG included). If you’re not a fan of fish flakes, you can omit them, although I highly recommend you at least try it with the flakes before tossing them out the window. They add such a lovely, smokey note that can only be found in these immensely flavorful flakes can lend. Once you have the basic recipe down, experiment with other flavor combinations. I’m working on a wasabi version right now, but you can do almost anything from classic sesame to matcha (think of a dish with a flavor profile like toasted rice in matcha broth) to a simple sesame salt, or gomashio.

Homemade Furikake Recipe

I love using furikake on popcorn, hard boiled eggs, in salads, and of course sprinkled over steaming hot rice. You could even keep a little ziploc bag of the stuff in your office drawer to spice up some noodles or other bland workday lunch that needs a pick-me-up.

No MSG. No hard work. Big rewards. Can’t get much better than that, can it?

Homemade Furikake

Ingredients

  • 1/3 cup nori sheets, broken up into small pieces
  • 1/2 cup white or black sesame seeds
  • 1 cup loosely packed bonito flakes (fish flakes), broken up into small pieces
  • 1 tablespoon soy sauce
  • 1 teaspoon mirin
  • 2 or 3 drops toasted sesame oil

Instructions

  1. Preheat the oven to 275 degrees F.
  2. In a small bowl, combine the sesame seeds and bonito flakes.
  3. Add the soy sauce and mirin and stir to evenly coat the sesame seed mixture. Add the nori and stir to combine.
  4. Spread the mixture in and even layer on a baking sheet lined with parchment paper.
  5. Bake for 15-18 minutes or until the mixture is dry and slightly toasted. Keep an eye on it while it cooks to make sure it doesn’t burn.
  6. Let the furikake cool for about 2 hours before transferring to an air-tight container.
  7. Store at room temperature for up to 2-3 weeks. (If it lasts that long.)


In Lunch & Dinner, Vegetarian, Cocktails and Appetizers
17 Comments
Orange Creamsicle Shake

Cocktail Friday: Boozy Creamsicle Shake

Rachael White June 14, 2013

It has been incredibly hot here this week. And dry. There are fires raging already here in Colorado and it is still very early in the season. The most destructive fire in Colorado's history, the Black Forest fire near Colorado Springs, has forced many to leave their homes, burned over 350 homes to the ground, and killed 2 people. I know how it feels to have to leave your home without much warning. The feelings of uncertainty and fear are not easy to cope with. My prayers are with all who have been affected by the fires and my hope is that this is not setting the scene for what we will experience throughout the rest of the summer.

Spiked Creamsicle Shake

I don't want to dwell on things that are sad. But they should be acknowledged. Take a moment to be thankful for your home, your safety, your family, and appreciate the good things. This creamsicle shake is a good thing. The classic flavors of orange and vanilla create a refreshing yet indulgently creamy treat with a little added heat from a healthy dose of vodka makes this a perfect adult version of a childhood favorite. It's quite possibly the perfect way to welcome the weekend.

Boozy Creamsicle Shake

I didn't add any milk to this milkshake because of how hot it is here, making the ice cream softer and easier to blend. Plus, the vodka provided enough extra liquid. However, you can certainly add milk if you like it a little thinner.

Boozy Orange Creamsicle Shake

Here's hoping you have a happy, safe weekend filled with love and laughter. No matter where you are or what challenges you have faced this week.

Cheers, friends!

Boozy Creamsicle Shake

  •  
  • 1/2 orange sherbet
  • 1/2 cup vanilla bean ice cream
  • 2 oz vodka
  • 1/4 cup milk, if needed
  • 1/4 cup heavy whipping cream
  1. Combine all ingredients except the whipping cream in a blender and blend until smooth.
  2. In a small bowl, use an electric mixer to whip the cream until soft peaks form. I didn't add sugar to my whipped cream because it was quite nice as is with the sweet shake.
  3. Pour the shake into a glass and top with a dollop of whipped cream.
  4. Serve and enjoy!


In Cocktails and Appetizers
Comment
← NewerOlder →

Search Posts


Featured Posts

Summary Block
This is example content. Double-click here and select a page to feature its content. Learn more
Featured
Nov 11, 2025
Cursus Amet
Nov 11, 2025
Nov 11, 2025
Nov 4, 2025
Pellentesque Risus Ridiculus
Nov 4, 2025
Nov 4, 2025
Oct 28, 2025
Porta
Oct 28, 2025
Oct 28, 2025
Oct 21, 2025
Etiam Ultricies
Oct 21, 2025
Oct 21, 2025
Oct 14, 2025
Vulputate Commodo Ligula
Oct 14, 2025
Oct 14, 2025
Oct 7, 2025
Elit Condimentum
Oct 7, 2025
Oct 7, 2025
Sep 30, 2025
Aenean eu leo Quam
Sep 30, 2025
Sep 30, 2025
Sep 23, 2025
Cursus Amet
Sep 23, 2025
Sep 23, 2025
Sep 16, 2025
Pellentesque Risus Ridiculus
Sep 16, 2025
Sep 16, 2025
Sep 9, 2025
Porta
Sep 9, 2025
Sep 9, 2025

Powered by Squarespace