Quantcast
  • Contact
  • Portfolio
  • Subscribe
  • Recipes
Menu

Set the Table Photography

photography
  • Contact
  • Portfolio
  • Subscribe
  • Recipes
×

Bone Dry Martini

Rachael White October 28, 2015

My round of Halloween cocktails continues with a Bone Dry Martini! Truthfully, it's just a dry martini with a little skeleton hanging out in the glass, but here's the wonderful thing about creating holiday-themed cocktails: you don't have to recreate the wheel. One thing that scares people when it comes to theme parties, or simply adding a festive touch, is that they are afraid it will be too hard.

So get that cocktail shaker out (or stir stick) and whip up a James Bond-worthy martini, toss in a skeleton, and get in the spirit of the season!

Oh, and don't forget the garlic-stuffed green olives. Because #vampires.

Bone Dry Martini

Makes 1 cocktail

  • 2 oz gin
  • 1/2 ozDry vermouth
  • 2 dashes bitters
  • 2 garlic stuffed olives
  1. Add all the ingredients to a cocktail shaker and fill with ice.
  2. Stir until thoroughly chilled and pour through a strainer into a chilled cocktail glass.
  3. Garnish with garlic stuffed olives (to keep the vampires away) and a (clean) skeleton or skull.
In Entertaining, Cocktails and Appetizers Tags halloween cocktail, cocktail recipes, halloween, martini
Comment

The Bloody Mummy

Rachael White October 27, 2015

And just like that, we have arrived at the last week of October. I can't tell you exactly how that happened so quickly, but lucky for you, I'm filling the last few days of the month with delicious, spooky cocktail recipes! How does one new recipe a day sound? Starting....NOW!

The Bloody Mummy is my Halloween take on a brunch staple: a Bloody Mary. Just add string cheese! It's a simple change that makes this mummified drink fit for any (adults only) Halloween party or perhaps a post-Halloween brunch.

Stay tuned for cocktail #2, coming up tomorrow!

The Bloody Mummy

Makes 2 large drinks

  • 2 cups tomato juice, low sodium
  • 1 1/2 teaspoons wasabi paste
  • 2 teaspoons soy sauce
  • 1 teaspoon shichimi togarashi
  • 2-3 tablespoons fresh lemon juice
  • 5 oz vodka or gin
  • celery salt
  • celery stalks
  • pickled green beans
  • carrot sticks
  • string cheese
  1. Put some celery salt on a plate. Using a lemon wedge, line the rims of two tall glasses. Gently dip the rims in the celery salt before filling each glass with ice.
  2. In a large glass measuring pitcher, combine the wasabi paste, soy sauce, shichimi togarashi and lemon juice. Whisk until combined.
  3. Pour the tomato juice over the wasabi mixture and stir to combine.
  4. Pull the string cheese apart in thin strips and carefully line each glass. This can be a little tedious but don’t worry about it being completely perfect. You will still get the mummy effect if a couple of the pieces fall out of place.
  5. Carefully add the ice in the glass, making sure not to disturb the cheese too much. The ice will work well to hold the strips in place.
  6. Put 1 1/2 oz of vodka in each ice-filled glass. Top with the tomato juice mixture and garnish with celery, carrots and pickled green beans.
In Entertaining, Cocktails and Appetizers Tags cocktail recipes, cocktail, halloween cocktail
Comment

Cocktail Friday: The Toasted Pear

Rachael White October 2, 2015

Brad and I started dating in September of 2004. I had seen him around campus before but never had a conversation with him. We sang in the choir together, had a class together, and had likely crossed paths dozens of times in between. Early on in our relationship, we confessed that we were relieved the timing worked out the way it did. In our early college years, we were busy making bad dating choices, getting our hearts broken, and piecing them back together. But in September of 2004, one simple act, which could have meant nothing just months earlier, caused a spark between us. I was walking across campus, headed to the music hall, when a rogue frisbee landed at my feet. Not being much of a frisbee player, I wasn't entirely sure what to do, but I bravely picked up the disc and made a once-in-a-lifetime perfect toss (is that even what it's called?) to this tall, skinny guy with dreamy blue-green eyes and lashes that went on for days. As I went on my way, quietly rejoicing that I didn't make myself look like an idiot, Brad was apparently already sure he wanted to ask me out. I unknowingly made it difficult for him. He tried and tried without any luck because he couldn't get me to stand still long enough to get to the asking-out part of our little chats. And then one day, like a jerk, I asked him out by complete accident like it was no big deal. I didn't even do it on purpose. Brad was understandably frustrated, especially since it wasn't clear that I knew this was going to be a date. It wasn't until I was getting ready to meet up with him that I realized it felt like more than just hanging out with a friend. So, I showered, did my hair, spritzed on some perfume (let's be honest: it was probably some fruity-scented body spray) and headed out the door. We went and saw the show I Love You, You're Perfect, Now Change (the perfect first-date ice-breaker) and showed up wearing identical outfits: black shirts and jeans. Embarrassingly endearing? Then we enjoyed a late night snack at the campus café and when we parted ways, we were both sporting giddy grins because we hoped this was the beginning of something great. 

That was where it all started. And now, when autumn brings that crisp, cool, clean air that I love so much, I remember those early days of falling in love with Brad. We sipped cinnamon-scented hot cider together while working on our homework, took walks around our little college town, and nervously admitted, just weeks after we began seeing each other, that this was love.

image.jpg

This year marks 10 years since Brad and I started dating and it seemed fitting to make a cocktail to celebrate the occasion. The Toasted Pear is simple and sweet with a hint of spice from classic fall flavors like cinnamon and clove. An elegant bruléed pear slice garnishes this playful fall cocktail, though you can use a plain pear slice if you don't have a torch.  

Toasted Pear Cocktail


If you can, sip this outside with crunchy leaves under your feet, sitting in front of a bonfire, or listening to your favorite fall music (I'm particularly fond of this right now). 

The Toasted Pear

Makes 2 Cocktails

For the Toasted Pear Simple Syrup:

  • 1 pear, cut into thick slices
  • 2 cinnamon sticks
  • 4 whole cloves
  • 1/4 cup sugar + 1 tablespoon
  • 1 cup water

For the cocktail:

  • 3 ounces rum
  • 1 1/2 ounces toasted pear simple syrup
  • 1/2 ounce fresh lemon juice
  • 2 slices of pear for garnish

For the Simple Syrup:

  1. To make the simple syrup, put the pear slices, cinnamon sticks, and cloves in a nonstick skillet over medium-high heat. Without disturbing the pear slices, toast them on one side for about 3 minutes or until they begin to turn golden brown. Flip and toast on the second side.
  2. Sprinkle 1/4 cup of the sugar over the pears and spices and stir until it begins to melt and caramelize just a bit. Carefully add the water and bring to a simmer, stirring until the sugar has dissolved. Continue to simmer for about 5 minutes or until the liquid reduces by about half.
  3. Pour the syrup through a strainer into a glass jar or liquid measuring cup. Set aside to cool.

For the cocktail:

  1. Begin by bruléeing the pear slices. Sprinkle with the remaining 1 tablespoon sugar. Using a torch, melt the sugar until it is golden and bubbly. Allow to cool slightly.
  2. While the slices cool, fill a cocktail shaker with ice. Add the rum, lemon juice and simple syrup and shake vigorously for 30 seconds. Pour into a cocktail glass and garnish with a bruléed pear slice.


In Entertaining, Cocktails and Appetizers Tags Cocktail Friday, cocktail recipes, rum cocktail, autumn cocktail
8 Comments

Cocktail Friday: Blackberry Vanilla Mocktail + VIDEO

Rachael White August 21, 2015

When Brad and I lived in Japan, we used to spend Friday nights enjoying Japanese beer, eating delicious Izakaya food (Japanese fried chicken FTW!) and doing pretty much anything we could to kick off the weekend in true 20-something, childless style. These days, with a 3 year old and 7 month old dictating our schedules and energy levels, we tend to lay low on the weekends. Friday nights involve pizza, sometime a movie, and falling asleep on the couch around 9:30pm. Yes. We are that exciting.

Despite the fact that our lifestyle, in a sense, has become much calmer and subdued when it comes to Friday nights, we still try to keep things fancy by making fun drinks from time to time. I love this Blackberry Vanilla Mocktail because it's delicious and kid-friendly but can easily double as an adults-only beverage. This beautiful drink also gave me some variety when I was pregnant, so if you have moms-to-be coming over for dinner, this is the perfect way to make sure they don't feel left out! 

And to show how simple this beautiful beverage is to make, check out my latest video with Penso Entertainment on the FoodieTV Youtube Channel! Don't forget to subscribe to the channel so you don't miss future videos!

Blackberry Vanilla Mocktail

Makes 2 drinks

  • 1/3 cup blackberries
  • juice of 1/2 a lemon
  • 1/2 teaspoon honey
  • seeds from 1/4 of a vanilla bean
  • Club soda
  • Mint and/or lemon slices for garnish
  1. In the bottom of a large glass or cocktail shaker, crush the blackberries with the lemon juice, honey and vanilla.
  2. Pour the mixture through a fine sieve set over a glass or liquid measuring cup.
  3. Fill two short glasses with ice and divide the juice between them. Top with club soda and garnish with mint leaves or lemon slices.


In Video, No Added Sugar, Cocktails and Appetizers Tags cocktail, mocktail, recipe
Comment
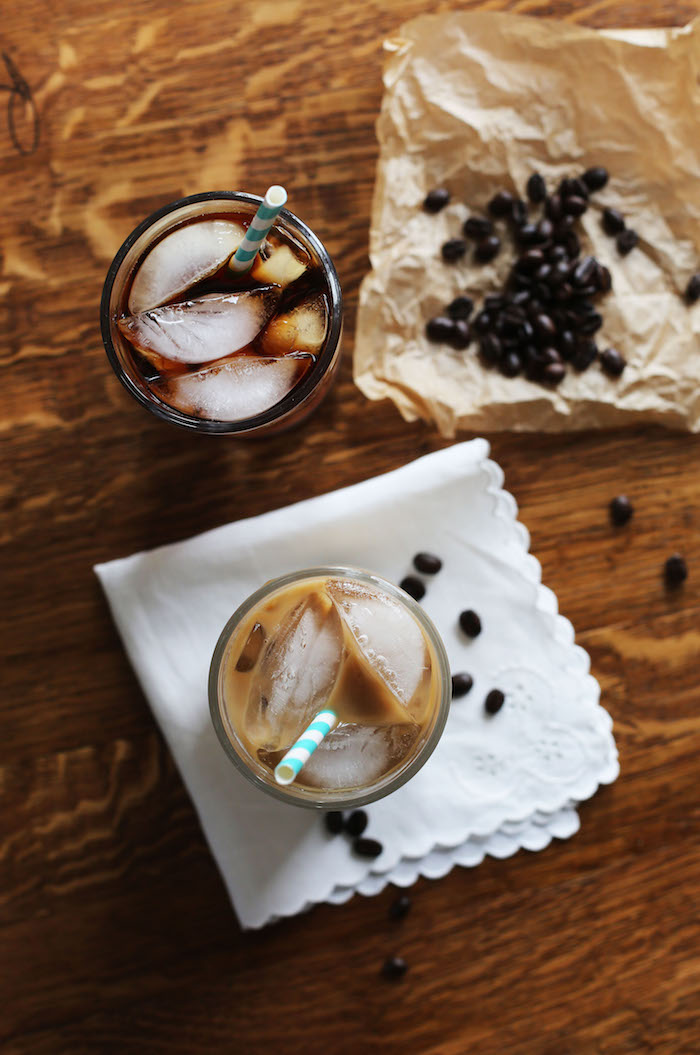
coldbrewcoffee.jpg

DIY Cold Brew Coffee

Rachael White May 14, 2015

I've been making small changes to our home lately. Well, some changes are small and some are huge. We live in a 1,000 square foot house that can easily feel cramped between 2 adults, 2 kids and 1 large black lab. In an effort to be more comfortable in the space we have, and to make life simpler all around, I've been using the KonMari method of "tidying up". So far I am thrilled with the results and how using her little book has already made our home feel more open, clean, and full of only the things we love. In the spirit of making life easier and full of the things we love, I thought this Cold Brew Coffee recipe was a must-share.

That makes total sense, right? KonMari = coffee? Sure!

coldbrewcoffeerecipe.jpg

Speaking of tidying up and making a space feel new and open and full of things you love, what do you think of the new blog design? I'm loving it. It feels clean and comfortable and ready for lots of delicious recipes and stories and all of the things. In fact, I've added some new features like Mom Stuff and an updated Wine Bar page. Oh, and I updated the About page as well! It's just all so bright and shiny and new. You should make this coffee, get comfortable, and browse around and make yourself at home.

OK- back to the coffee.

Truth be told, I'm really more of a hot coffee drinker regardless of the weather. I don't know why that is. Maybe it's because I like to savor my coffee and when it is cold I always drink it wayyyyy too fast. Or maybe it has something to do with the fact that when I find something I like, I like to stick with it. Who knows. But there are a number of afternoons when I just need a little pick-me-up and this cold brew comes to the rescue. It's amazing over ice with chocolate almond milk (hellooooo iced mocha!) and I always love the classic iced latte kind of thing. Or you can go straight up coffee concentrate + water over ice.

Did I mention that this is a concentrate? Yep. Super strong so you can store it in the fridge in a reasonable sized container. I like to use the large mason jars, of which I have a million, that are lying around my kitchen needing a purpose.

coldpresscoffeeconcentrate.jpg

Brad LOVES iced coffee, so this is a nice, easy way for him to grab his caffeine and go when he leaves before the sun rises for work. Speaking of which, that guy works a lot. It can be so hard sometimes, but when he comes home at the end of the day and tells me about the things he has done, I almost burst with pride. He is good. I don't tell him that enough. And on that note, give your teachers and school administrators some extra positive vibes this time of year because it is tough for them and for their families. In fact, you should bring them a jar of this cold brew coffee!

PERFECT TEACHER GIFT!

icedcoffeerecipe.jpg

Important notes:

  • When you make this, be VERY CAREFUL when straining the coffee. It's safest to give it all a stir first so your coffee grounds don't all fall out at once leaving you with a massive mess of black grime all over your white kitchen cabinets and in the crevices of your wood floor. I heard this from a friend. ;)
  • The strength of your coffee will depend on the grind of your coffee beans. I tend to like stronger coffee, so I use espresso grind (finer). Also, the amount of time you let the coffee brew will make a difference in the strength as well.
  • Lastly, the quality of your coffee is important! The better and fresher your coffee, the better the final product will taste. In my opinion, it is worth the splurge on something really great because you will STILL be saving money since you aren't going to the coffee shop to give them $$$ for just one cup. This recipe yields at least 5 cups and doesn't even use an entire bag of coffee! Look at you, you money saver, you!


And now, finally, the recipe! Best enjoyed in a sunny spot with a straw and a good book.

DIY Cold Brew Coffee

  • 1 1/2-2 cups ground coffee
  • 8 cups water
  • fine mesh sieve or a couple layers of cheese cloth 
  • coffee filter
  1. Place the coffee grounds in the bottom of a large pitcher or bowl.
  2. Add the water and stir.
  3. Cover with plastic wrap and place in the refrigerator for 12-24 hours.
  4. Give the coffee and the grounds another stir (see note above for reasoning). Place the fine mesh sieve over another pitcher or bowl.
  5. Pour the coffee into the sieve. This will not remove all the grounds. Don't be alarmed.
  6. Now, clean out the sieve and line it with a coffee filter. Place it over another large bowl or pitcher and strain a second time.
  7. Transfer to a large mason jar (or two) or a pitcher and refrigerate.
  8. When ready to use, use 1 part coffee (I use about 1/2 cup of the coffee concentrate) to 1 part water or milk. Serve over ice.
In Cocktails and Appetizers, Breakfast & Brunch, No Added Sugar Tags recipe, coffee, beverages, summer recipes
2 Comments
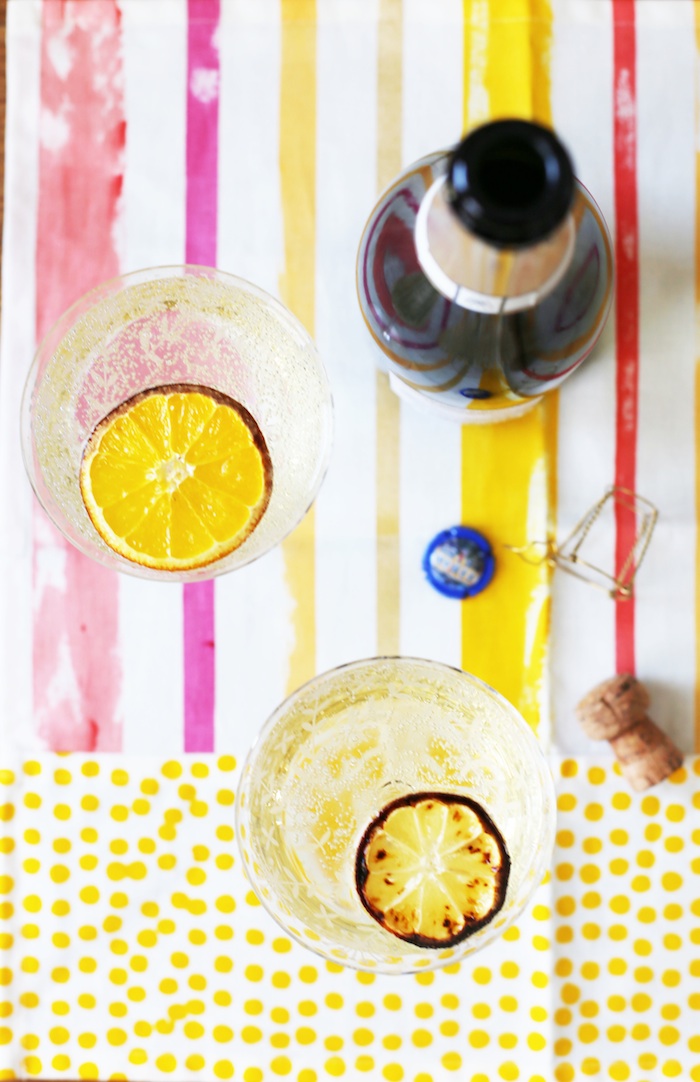
French-75-with-Broiled-Citrus-Set-the-Table.jpg

French 75 + Broiled Citrus (Set the Table turns 2!)

Rachael White March 6, 2015

Set the Table turns 2 today! Actually, this is my 6th year of blogging but my 2nd blogging in this space. It all started so innocently as a way to communicated with my family and friends. I had no idea what I was getting myself into. I think it's safe to say that food blogging has become something I can't live without. It has connected me with so many wonderful people and has helped me to connect with passions I didn't know I had. Much of the joy I feel for this crazy fun (and sometimes ridiculously difficult) thing I've been sucked into is thanks to all of you. Readers and fellow bloggers bring a smile to my face each and every day and I feel so blessed by that not-so-little gift. Because when it comes right down to it, I think all we can ask for is to have people in our lives who give us a reason to smile and help empower us to do what we love. So I'd like to raise a glass (preferably filled with this bubbly, fun French 75) to 2 years of Set the Table.

Broiled-Citrus-Cocktail-Set-the-Table.jpg

I have to be honest and say that I almost missed my blogiversary entirely. The past few weeks have been a little ridiculous. Riley got the flu and was sicker than I've ever seen him. Braden came down with RSV and consequently was sent to the NICU with bronchiolitis. I had a sinus infection that still hasn't quite left me alone. And now Riley has a double ear infection. As if life with a new baby weren't challenging enough, the big guy upstairs decided to give us a bit more to struggle through. We are all doing fine but I won't lie- there were times when I couldn't imagine how we would ever climb out of that hole. Fortunately, we had a lot of help with food, laundry, and keeping our spirits as high as possible thanks to our amazing family and church family. Without their help, I'm quite certain I would be crying under the covers right now. Community is important, people. Don't ever forget that.

Broiled-Citrus-Set-the-Table.jpg

I've mostly been taking baby steps to get back into my usual routines. I find that the more I introduce my 'old' habits into our new life as a family of 4, the better I feel. Putting together this blog post is a perfect example. I may not have everything figured out, but little things like this help ground me and remind me that I am more than the spit up on my ratty old t-shirt and the pile of dirty dishes in the sink. I love being a mom and wouldn't change it for the world, but to be the best mom I can be I need to stay connected to who I am apart from that.

Thanks for being patient with me while I figured out how to make that happen after so many unexpected bumps in the road.

Winter-Citrus-Cocktail-Set-the-Table.jpg

This French 75, garnished with broiled citrus slices, is so beautiful and fresh that it will bring you out of your dark winter haze in no time at all. The playful bubbles paired with the deep flavor of broiled citrus (if you haven't tried broiling citrus you need to get on that now) make the perfect cocktail for this awkward transition between winter and spring. Spring is coming, you know. I promise. This cocktail might help it come a little faster...

Broiled-Citrus-Champagne-Cocktail-Set-the-Table.jpg

Here's to another year, more new recipes, and even more new friendships from Set the Table! 

French 75 + Broiled Citrus

Makes 1 cocktail

2 oz gin

4 oz chilled champagne

1/2 oz broiled lemon juice (instructions below)

broiled citrus slice

In a champagne flute, add the gin and lemon juice. Top with the champagne and garnish with a citrus slice. Enjoy!

Broiled Citrus

1 lemon, sliced

1 orange, sliced

1 orange cut in half

1 1/2 teaspoons granulated sugar

Arrange the slices on a parchment lined, rimmed baking sheet. Sprinkle the citrus slices and orange halves with the sugar and place under the broiler and cook until caramelized, about 5-7 minutes. Keep a close eye on them so they don't burn!

In Cocktails and Appetizers Tags champagne cocktail, gin cocktail recipe, winter citrus recipe
6 Comments
← NewerOlder →

Search Posts


Featured Posts

Summary Block
This is example content. Double-click here and select a page to feature its content. Learn more
Featured
Aug 2, 2025
Cursus Amet
Aug 2, 2025
Aug 2, 2025
Jul 26, 2025
Pellentesque Risus Ridiculus
Jul 26, 2025
Jul 26, 2025
Jul 19, 2025
Porta
Jul 19, 2025
Jul 19, 2025
Jul 12, 2025
Etiam Ultricies
Jul 12, 2025
Jul 12, 2025
Jul 5, 2025
Vulputate Commodo Ligula
Jul 5, 2025
Jul 5, 2025
Jun 28, 2025
Elit Condimentum
Jun 28, 2025
Jun 28, 2025
Jun 21, 2025
Aenean eu leo Quam
Jun 21, 2025
Jun 21, 2025
Jun 14, 2025
Cursus Amet
Jun 14, 2025
Jun 14, 2025
Jun 7, 2025
Pellentesque Risus Ridiculus
Jun 7, 2025
Jun 7, 2025
May 31, 2025
Porta
May 31, 2025
May 31, 2025

Powered by Squarespace