

If you’re looking for a way to make your hot dog game a little more exciting, try these Cheesy Kimchi Hot Dogs! You can thank me later.
Read MoreCreamy Grilled Scallion Jalapeño Salad Dressing
This recipe has no sugar added, which made me think that I should remind you all to check out Jacqueline Smith's Go Sugar Free Course! A new course begins soon, and I want to encourage you all to at least head to her site to read about the amazing work she does to help people (like me) get control and lead their healthiest, happiest life! Taking her course changed the way I feed my family and myself and I am so grateful for that.

This is going to sound ridiculous, but I feel like I'm finally getting my life in order after having my youngest son TWO YEARS AGO. I know. It's taken me this long and I think that's probably OK and not unusual. I mean, babies are hard work. You're tired, anxious, deliriously in love, and unsure ALL THE TIME. Once you get out of that phase, which lasts about 12-18 months, you enter the omg-I-have-a-toddler-slow-the-eff-down phase. Not as exhausting as the first phase, but close. Things are dropped and broken on the daily, but you get the sweetest hugs and kisses on the face of planet, so the deliriously in love part stays as intense as ever, and you have more freedom to do things like laundry and meal prep. That's our current phase.

Fortunately, this phase is coming at a good time because the 5 year old is involved in lots of evening activities right now. I have my wits about me enough to get a meal plan together each week, which helps me have our dinner ready and in the Instant Pot/Slow Cooker/Rice Cooker before we head out for swimming/soccer/choir/etc. Now that the weather is getting warmer, my current favorite trick is throwing a ton of stuff on the grill Sunday night so we have ready-to-eat options throughout the week. Grilled meat and veggies are perfect in everything from pasta to bowls to sandwiches.
Spoiler Alert: I'm working on an eBook to help you all prep for the week with realistic recipes that are Set the Table worthy: beautiful, healthy, and delicious. Keep your eyes peeled here and here for updates on this exciting project! I cannot WAIT to share it with you all.

Annnnd moving on to this gorgeous salad dressing...
This dressing came about thanks to a big batch grilling night a couple weeks ago. I had a jalapeño and a bunch of scallions that needed to be used up, so onto the grill they went! I didn't have an exact plan for them, but getting them nice and charred helped me come up with the idea to whir them in the blender to make a tasty, easy salad dressing for the week. I used a touch of mayo, a lot of plain greek yogurt, lime juice, cilantro, garlic, and some salt and pepper. And I was immediately addicted.

My sometimes boring lunch turned into a zingy salad of all my favorite things (hearts of palm, avocado, grilled chicken thighs, crushed tortilla chips) and a healthy drizzle of this creamy grilled scallion jalapeño salad dressing.

I have also found that this dressing makes an excellent dip for cut up veggies, or a spread for sandwiches! Hello, multi-tasker of my dreams!
So the next time you fire up your grill, make sure you have a jalapeño and some scallions to add to the mix so you can make and enjoy this all week long. YOU'RE WELCOME.
Creamy Grilled Scallion Jalapeño Salad Dressing
Makes about 1 cup of dressing
Prep time: 5 minutes
Cook time: 5 minutes
Total time: 10 minutes
- 1 medium/large jalapeño, grilled, stem removed (for spicy: leave seeds intact | for mild: scrape out seeds and membrane)
- 4 scallions, trimmed and grilled
- 1/3 cup mayo
- 1/2 cup plain greek yogurt (I suggest Tillamook or Noosa)
- 1/2 cup cilantro, leaves and stems
- 1 clove of garlic
- juice of 2 limes (at least 2 tablespoons total)
- salt and pepper to taste
- milk to thin the dressing if needed
- Place all ingredients in a blender or food processor.
- Pulse until creamy dreamy dressing forms. Taste and adjust seasoning as necessary.
- Store in an airtight container in the fridge and use as needed.

Vegan Fudgsicles
The cutest popsicle molds deserve the most delicious popsicle! Or Fudgsicle, in this case. These vegan fudgsicles are addicting for both kids and adults! Plus, they’re filled with ingredients you can feel good about!
Read More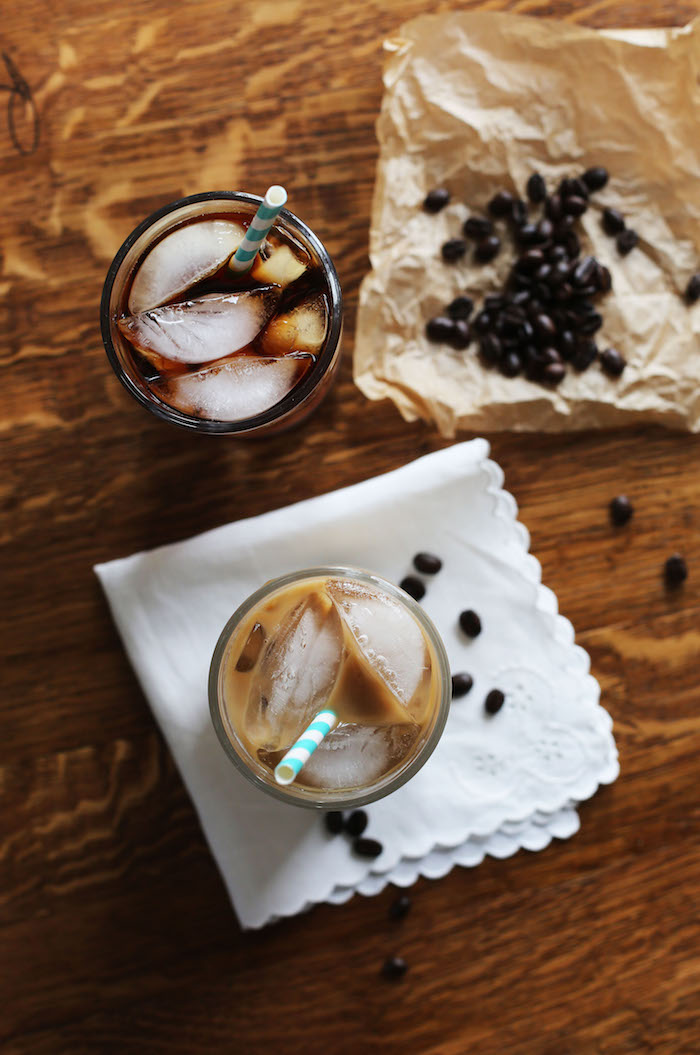
DIY Cold Brew Coffee
I've been making small changes to our home lately. Well, some changes are small and some are huge. We live in a 1,000 square foot house that can easily feel cramped between 2 adults, 2 kids and 1 large black lab. In an effort to be more comfortable in the space we have, and to make life simpler all around, I've been using the KonMari method of "tidying up". So far I am thrilled with the results and how using her little book has already made our home feel more open, clean, and full of only the things we love. In the spirit of making life easier and full of the things we love, I thought this Cold Brew Coffee recipe was a must-share.
That makes total sense, right? KonMari = coffee? Sure!

Speaking of tidying up and making a space feel new and open and full of things you love, what do you think of the new blog design? I'm loving it. It feels clean and comfortable and ready for lots of delicious recipes and stories and all of the things. In fact, I've added some new features like Mom Stuff and an updated Wine Bar page. Oh, and I updated the About page as well! It's just all so bright and shiny and new. You should make this coffee, get comfortable, and browse around and make yourself at home.
OK- back to the coffee.
Truth be told, I'm really more of a hot coffee drinker regardless of the weather. I don't know why that is. Maybe it's because I like to savor my coffee and when it is cold I always drink it wayyyyy too fast. Or maybe it has something to do with the fact that when I find something I like, I like to stick with it. Who knows. But there are a number of afternoons when I just need a little pick-me-up and this cold brew comes to the rescue. It's amazing over ice with chocolate almond milk (hellooooo iced mocha!) and I always love the classic iced latte kind of thing. Or you can go straight up coffee concentrate + water over ice.
Did I mention that this is a concentrate? Yep. Super strong so you can store it in the fridge in a reasonable sized container. I like to use the large mason jars, of which I have a million, that are lying around my kitchen needing a purpose.

Brad LOVES iced coffee, so this is a nice, easy way for him to grab his caffeine and go when he leaves before the sun rises for work. Speaking of which, that guy works a lot. It can be so hard sometimes, but when he comes home at the end of the day and tells me about the things he has done, I almost burst with pride. He is good. I don't tell him that enough. And on that note, give your teachers and school administrators some extra positive vibes this time of year because it is tough for them and for their families. In fact, you should bring them a jar of this cold brew coffee!
PERFECT TEACHER GIFT!

Important notes:
- When you make this, be VERY CAREFUL when straining the coffee. It's safest to give it all a stir first so your coffee grounds don't all fall out at once leaving you with a massive mess of black grime all over your white kitchen cabinets and in the crevices of your wood floor. I heard this from a friend. ;)
- The strength of your coffee will depend on the grind of your coffee beans. I tend to like stronger coffee, so I use espresso grind (finer). Also, the amount of time you let the coffee brew will make a difference in the strength as well.
- Lastly, the quality of your coffee is important! The better and fresher your coffee, the better the final product will taste. In my opinion, it is worth the splurge on something really great because you will STILL be saving money since you aren't going to the coffee shop to give them $$$ for just one cup. This recipe yields at least 5 cups and doesn't even use an entire bag of coffee! Look at you, you money saver, you!
And now, finally, the recipe! Best enjoyed in a sunny spot with a straw and a good book.
DIY Cold Brew Coffee
- 1 1/2-2 cups ground coffee
- 8 cups water
- fine mesh sieve or a couple layers of cheese cloth
- coffee filter
- Place the coffee grounds in the bottom of a large pitcher or bowl.
- Add the water and stir.
- Cover with plastic wrap and place in the refrigerator for 12-24 hours.
- Give the coffee and the grounds another stir (see note above for reasoning). Place the fine mesh sieve over another pitcher or bowl.
- Pour the coffee into the sieve. This will not remove all the grounds. Don't be alarmed.
- Now, clean out the sieve and line it with a coffee filter. Place it over another large bowl or pitcher and strain a second time.
- Transfer to a large mason jar (or two) or a pitcher and refrigerate.
- When ready to use, use 1 part coffee (I use about 1/2 cup of the coffee concentrate) to 1 part water or milk. Serve over ice.