Quantcast
  • Contact
  • Portfolio
  • Subscribe
  • Recipes
Menu

Set the Table Photography

photography
  • Contact
  • Portfolio
  • Subscribe
  • Recipes
×

Kale + Parsley Pesto

Rachael White March 31, 2014
20140331-113648.jpg

Creating a successful road trip with a toddler is a little bit like recipe testing. You have to find the right combination of ingredients, then test each amount. Eventually, you realize that you only need a pinch of this, a handful of that, and to mix it all roughly with your hands. Rather than an exact recipe, it's similar to making dough. You have to know it and understand it by touch, feel, and sometimes sound. The first day of our road trip last summer, if it were to be compared to dough, didn't rise. Instead, we began the day with our dog bolting out the door of our mini van (I still can't believe we drive one of those- apparently she wanted nothing to do with it), and getting just barely hit by a car. Yep. A car actually hit her. Fortunately, it was early enough in the morning that there was little traffic and the cars that were on the road had plenty of time to slow down so she didn't get hurt. I'm just gonna throw this out there: worst start to a road trip ever.

20140331-113709.jpg

The rest of the day was filled with lots of crying from our then 1 1/2 year old in the back seat. He didn't sleep one wink from 6am until 9pm. It was a long day and we were all pretty ragged by the end of it. Problem #1: we wanted to be the parents who didn't resort to TV shows to survive a road trip. I never had that growing up, why should Riley? But then I realized most of my road-tripping happened when I was old enough to entertain myself, chose to sleep in the car, and read books. This time, we allowed a little TV near the end of the day- Sesame Street, Land Before Time and Daniel Tiger - in the hopes that it would keep us all a bit more sane. That, combined with introducing new toys every couple of hours and pulling off of the interstate to get out and stretch our legs for a few minutes, gave us a 1,000% improved day of driving.

Ya gotta do what ya gotta do. Right?

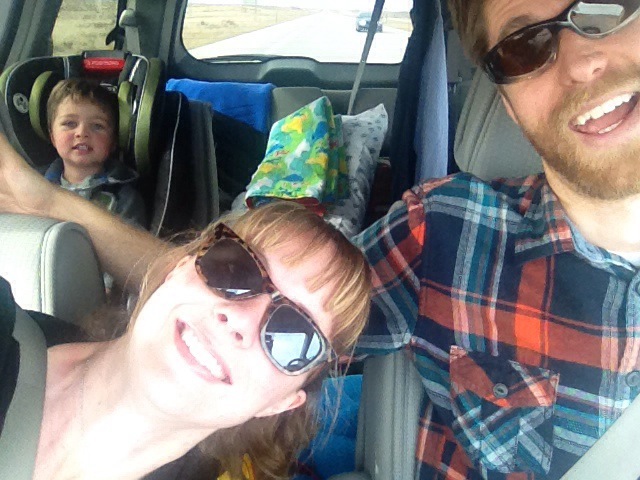
When it comes right down to it, anything that gets us from Colorado to Iowa en route to Minnesota for moments like this is completely worth it...

20140331-113623.jpg

So, can we move on to this Kale & Parsley Pesto? OK. Let's do it.

I've been making kale pesto for a while now. I love it and so does the rest of my family, which makes me so happy. (Just one more way to make grilled cheese sandwiches and pasta a bit healthier- yes!) I've been testing recipes for kale pesto and this is my absolute favorite. I like to use pistachios, a healthy amount of lemon juice, and of course garlic, olive oil, salt and pepper. I don't add parmesan cheese, as many traditional pesto recipes do, but you certainly could if you wanted to.


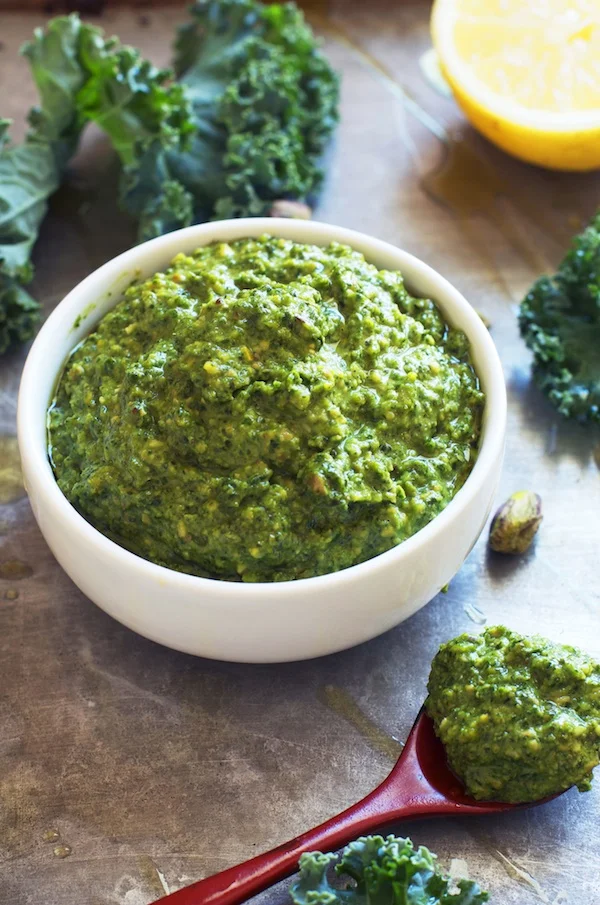
The vibrant green color (that withstands time and heat without turning brown) and bright flavor are enough to keep you coming back for more. Every little bite helps when you're trying to work more greens into your diet and this pesto makes it infinitely easier to do just that.

Kale & Parsley Pesto

Ingredients

  • 4 cups chopped kale leaves, washed & ribs removed
  • 1 cup flat leaf parsley (a few tender stems are ok to include but remove any larger, tougher stems)
  • 1/2 cup shelled, unsalted pistachios
  • 3 cloves garlic
  • 1/4 cup lemon juice (from about 1 lemon)
  • 1 teaspoon course salt
  • 1/2 cup olive oil
  • 1/4 cup water
  • salt & black pepper to taste

Instructions

  1. Combine the pistachios, garlic, lemon juice, and 1 teaspoon salt in a food processor. Pulse until the mixture is well mixed and looks a little like wet sand.
  2. Add the kale and parsley to the processor bowl and pulse until just finely chopped, about ten 1 second pulses.
  3. With the processor running, slowly stream the olive oil into the processor, followed by the water.
  4. Taste the pesto and season with salt and pepper, pulsing a couple of times to combine.
  5. Store in an airtight container for 1-2 weeks.

Notes

If you want a thinner/thicker pesto, add a little more water (not too much...just a tablespoon at a time but no more than 2 or 3 total) and/or extra olive oil.

In No Added Sugar, Sides + Condiments, Vegetarian
2 Comments
Silky-Spiced-Carrot-Soup-Set-the-Table.jpg

Roasted Carrot Soup with Tillamook Greek Yogurt

Rachael White March 18, 2014

I'm learning that this time of year is a little crazy here in Colorado. One day it is a bright, sunny 70 degrees and the next brings piles of wet, heavy snow. I kind of love it. I'm a winter girl who loves being cozy in the house with something delicious cooking on the stove or in the oven. But I also get to the point where vitamin D is a necessity. And it must be in the form of beautiful, hot rays of real live sunshine.

Creamy-Carrot-Soup-with-Tillamook-Farmstyle-Greek-Yogurt-Set-the-Table.jpg

Spring in Colorado also means that crazy hot weather is not far behind. Last year it was far too warm to use the oven in our house. (We have a tiny swamp cooler that barely keeps half of the house at a comfortable temperature.) So, I'm trying to get all the oven time that I can under my belt before it's too much to bear. This means baking buttermilk drop biscuits, Irish soda bread, and roasting lots of vegetables. This soup was the result of a big sheet pan of carrots, onions, and garlic that I drizzled with honey and roasted for about an hour. Everything was perfectly soft and golden brown with a honey glaze that gave a subtle sweetness to offset the rich roasted flavor.

I simply took the roasted vegetables and tossed them in a pot with some chicken stock (just like I do for my Butternut Squash & Coconut Soup). After it all simmers together for about 10 minutes, I take my immersion blender and transform it into a creamy, luxurious soup that is perfect with a dollop of creamy Greek yogurt and a few fresh thyme leaves. It's just so. darn. easy.

Silky-Carrot-Soup-with-Tillamook-Farmstyle-Greek-Yogurt-Set-the-Table.jpg

Can we talk about Greek yogurt for just a moment? I love it. I eat it pretty much every day. So when I got the chance to get a first taste of Tillamook's new Farmstyle Greek Yogurt I was thrilled. I used the 0% Farmstyle Greek for topping this soup and it is creamy and rich and has no hint of being fat free. Check out my Instagram feed for more photos of the flavors I'm trying. They've all been such a treat! My favorite so far is...wait for it...CINNAMON HAZELNUT. Perfect.

Tillamook is a well-known brand. I probably don't have to tell you how delicious their cheese is...right? You've had it, right? RIGHT? If you haven't you're going to need to fix that. STAT. Since they are new to the Greek yogurt scene, here are some delicious details...

About Tillamook Farmstyle Greek Yogurt

·         Tillamook Farmstyle Greek Yogurt is made with no artificial flavors, no artificial colors, no artificial sweeteners, no high fructose corn syrup and with the highest quality milk from cows not treated with artificial growth hormones.

·         Tillamook Farmstyle Greek is a thick, creamy and less tart yogurt made with buttermilk cultures, while providing 14g of protein per serving.

·         To make their better tasting Greek distinctively ‘Farmstyle’, Tillamook slow churns farm fresh milk with seven active yogurt and buttermilk cultures.

·         Tillamook Farmstyle Greek Yogurt is made with fruits and nuts locally sourced from the Pacific Northwest

·         To find out where to buy Tillamook Farmstyle Greek Yogurt readers can use the handy ‘Where to Buy’ tool - http://www.tillamook.com/where-to-buy.html?product=yogurt&variety=all&size=all&zip=

Roasted Carrot Soup with Tillamook Greek Yogurt

Serves 6-8

Ingredients

  • 2 lbs carrots, peeled and cut into 1/2 inch rounds
  • 1 large yellow onion, cut into wedges
  • 1 head of garlic, cut in half crosswise
  • 1 teaspoon ground cumin
  • 1 teaspoon ground cinnamon
  • 1/8 teaspoon ground nutmeg
  • 2 tablespoons honey
  • 2 tablespoons olive oil
  • salt and pepper to taste
  • 6 cups low sodium chicken stock
  • 1 tablespoon fresh lemon juice
  • 1/2 cup plain Greek yogurt
  • 1 tablespoon fresh thyme leaves

Instructions

  1. Preheat the oven to 375 degrees Farenheit.
  2. Line a large rimmed baking sheet with aluminum foil.
  3. In a large bowl, toss the vegetables with the spices, honey, olive oil and a bit of salt and black pepper.
  4. Spread the vegetables onto the baking sheet in a single layer. If you need to, use two baking sheets so the veggies aren't crowded.
  5. Roast the veggies for 45 minutes-1 hour or until nicely softened and golden brown. Stir every 20 minutes to ensure even cooking and to avoid burning the honey.
  6. Take the garlic and squeeze the cloves out into a soup pot. (To make sure the garlic skin doesn't make it into the pot, squeeze the cloves into a separate bowl first, then transfer to the pot.)
  7. Add the rest of the vegetables and the stock to the pot and place over medium heat. Bring to a simmer and cook for 10 minutes.
  8. Use an immersion blender and blend until the soup is nice a smooth. Alternately, you can work in batches, pureeing the soup in a blender. Be very careful as hot liquids may explode out the top of the blender.
  9. Add the lemon juice. Taste and adjust seasonings as needed.
  10. Ladle the soup into serving bowls and top with a dollop of Greek yogurt and some thyme leaves.


In Lunch & Dinner, No Added Sugar, Vegetarian Tags Carrots, healthy, Soup, Spring, yogurt
4 Comments
Creamy-Miso-Dip-for-Veggies-Set-the-Table.jpg

Creamy Miso Dip

Rachael White February 24, 2014

I've been working like a crazy person lately. Cooking, doing dishes, taking photographs, editing recipes...and yet I make it to 2pm without having eaten a single bite of food. It goes something like this: work, work, work, work, forget to eat, work, work, CRASH.

Yes, that's about right.

Creamy-Miso-Dip-Set-the-Table.jpg
Creamy-Miso-Veggie-Dip-Set-the-Table.jpg

In order to avoid this afternoon down-slide, I've been trying to put out healthy things to munch on. This creamy miso dip has been perfection. Shiro (white) miso, the mildest miso paste, is mixed with Kewpie mayonnaise. If you've never tried Kewpie mayonnaise you should probably get on that. Now. Go ahead and run to the nearest Asian grocery store. I'll wait.

Ready to continue? Good.

Kewpie mayonnaise is popular in Japan. The flavor is different from the mayonnaise we buy here thanks to ingredients famous for adding umami to dishes. In Japan it is used on anything from yakisoba to pizza. Here, I've used it in a more familiar way that I learned from a Japanese friend. She made this dip for my baby shower and I absolutely fell in love with it.

Sugar-Snap-Peas-Miso-Dip-Set-the-Table.jpg

You don't have to make much of this dip because it is so full of wonderful flavor. The only tip my friend gave me when I asked her for the recipe was that you have to experiment with the amount of Kewpie and miso to determine the balance of flavors you prefer. I like to add a touch of light soy sauce to my dip as well, but you can add anything from chopped scallions to sesame oil or toasted sesame seeds. It's a great blank canvas.

Creamy Miso Dip

Ingredients

  • 2 tablespoons shiro miso
  • 1/3 cup Kewpie mayo
  • 1 teaspoon light soy sauce

Instructions

  1. Combine all ingredients in a small bowl and stir vigorously until smooth. Serve with fresh vegetables like carrots, sugar snap peas, celery and radishes.

Notes

If you don't have access to Kewpie mayonnaise, take 1/3 cup regular mayonnaise and add 1/2 teaspoon rice vinegar, 1/2 teaspoon soy sauce, and a pinch of garlic powder. Stir to combine and use as directed in the recipe creamy miso dip.

In Vegetarian, Cocktails and Appetizers
10 Comments
Paleo-Chocolate-Almond-Cookies-Set-the-Table.jpg

Paleo Chocolate-Almond Cookies

Rachael White February 14, 2014

Happy Valentine's Day friends! How is your day going so far? Any super romantical things happening out there? Tell me all your stories! I'm still in my PJ's, 2 cups of coffee into the day, and trying to wrap my head around getting outside to enjoy what seems to be a warm, sunshiney day out there. But first, I wanted to share this cookie recipe with you. There are some things about this recipe that are not often seen in my kitchen. First off, they have ZERO added sugar. There is a touch of honey but that is all. Second, these are Paleo AND gluten free! WHAT.

Chocolate-Almond-Paleo-Cookie-Recipe-Set-the-Table.jpg

I was a little nervous when I first made these because the combination of ingredients did not equate cookie success. Without butter, sugar, and flour I thought they would for sure be a failure. But, because I was intensely determined, I went ahead and tossed everything in a bowl and gave it my all! I'm happy to report that they make the house smell delicious, just as any other cookie might.

A couple things to note before I send you off to make these for your GF, Paleo diet sweetheart:

  • The dough will seem VERY dry when you roll it out. Placing it between two pieces of parchment after pressing it together with your hands will help.
Rolling-Paleo-Cookie-Dough-Set-the-Table.jpg
  • Depending on the consistency of your nut butter (I used almond but you could also use peanut) you may want to zap it in the microwave for about 10 seconds to loosen it up a bit so it is easier to stir with the honey.
  • Do NOT- I repeat, do NOT- roll the dough out too thin. The cookies will absolutely crumble to pieces if they are to thin. Somewhere around 1/4inch and 1/3 inch is just about perfect.

The last tip I have for you is this: these cookies are best made with a tiny human who stole your heart the moment he entered this world...

Kid-Approved-Paleo-Cookies-Set-the-Table.jpg
Cutting-Paleo-Cookies-Set-the-Table.jpg

Or with your bestie. Or while jamming out to your very favorite music. Whatever you do, make sure you have a happy heart and remember love in all it's forms. It's pretty great.

Paleo-Chocolate-Almond-Heart-Cookies-Set-the-Table.jpg

Paleo Chocolate-Almond Cookies

Ingredients

  • 1 cup almond flour
  • 2 tablespoons cocoa powder
  • 2/3 cup almond butter or peanut butter (Natural, unsweetened)
  • 2 tablespoons honey
  • 1 tablespoon almond milk
  •  

Instructions

  1. Preheat the oven to 325 degrees Fahrenheit.
  2. In a small bowl, whisk the almond flour with the cocoa powder.
  3. In another medium bowl, stir the almond butter, honey and almond milk together until smooth. If the nut butter seems to stiff, microwave it for 10 seconds to loosen it up and make it easier to stir.
  4. Add the almond flour mixture to the nut butter and stir until combined.
  5. Transfer the dough to a piece of parchment laid out on a work surface. Press the dough together with your hands and flatten it into a disc.
  6. Cover the dough with another piece of parchment paper and roll the dough to about 1/3 of an inch but no thinner than 1/4 inch.
  7. Transfer the dough to a baking sheet and refrigerate for about 30 minutes.
  8. Remove the dough from the fridge and cut it into shapes with a cookie cutter.
  9. Carefully transfer the cut cookies to a parchment lined baking sheet.
  10. Bake 8-10 minutes or until just beginning to turn golden brown.
  11. Cool completely on the baking sheet then transfer to the refrigerator again for another 30 minutes before eating.
In Dessert, Vegetarian Tags Almond Butter, baking, chocolate, cookies, gluten free, Paleo, Valentine's Day recipe
1 Comment

Chipotle Shrimp over Creamy Polenta

Rachael White February 11, 2014

There is chocolate all over the inter-webs. All. Over. Chocolate, heart-shaped stuffs are here there and everywhere and I've decided to detour. I love chocolate just as much as the next gal but I wanted to contribute something a little different and off the beaten path. Chipotle shrimp with creamy polenta is simple to make (gentlemen, I'm talking to you!) and it has spice (a known aphrodisiac) and luxurious polenta that has been combined with tangy sour cream.

As I made this dish the other day, I was reminded of the first Valentine's Day Brad and I spent together. I wanted to impress him with something delicious, exotic, and like nothing he'd ever eaten before. I settled on red curry coconut soup with shrimp. It was beautiful. I somehow found huge, lovely shrimp in the middle of the Iowa corn fields (I don't care to think about how that was made possible) and the little kitchen in his on-campus house smelled divine. We sat down with a couple glasses of wine, dim lights, and bowls full of what I was sure would be a triumphant success of a meal.

Chipotle-Shrimp-Spinach-with-Creamy-Polenta-Set-the-Table.jpg

Bless his heart, Brad took two bites before he said what we both were thinking. It was blazing hot and our mouths were almost certainly on fire. We ditched the wine and opted instead for splitting a gallon of milk to rid our tongues of the miserable sting of too much red curry.

On the one hand, I was heart-broken that I had ruined our first Valentine's Day meal. On the other hand, I was comforted that Brad cared enough so early in our relationship to endure a few bites of something completely inedible just to spare my feelings.

Chipotle-Shrimp-over-Creamy-Polenta-Set-the-Table.jpg

That humiliating experience has not gone far from my thoughts each and every time this holiday rolls around. This year, I think I've done it right. This dish is a perfect combination of slight heat balanced by the creamy sour cream spiked polenta.

And go ahead...follow it up with one of the many chocolate desserts. I know I will!

Chipotle Shrimp over Creamy Polenta

Serves 2

Ingredients

For the polenta:

For the shrimp:

  • 1 cup stone ground (not instant) polenta
  • 1/2 cup sour cream
  • salt and pepper to taste
  • Fresh baby spinach or other greens for garnish
  • 8-10 large shrimp, shelled and deveined
  • 2 teaspoons chipotle powder
  • 1 tablespoon olive oil
  • salt and pepper to taste

Instructions

  1. Move an oven rack to the top position.
  2. Preheat the broiler.
  3. Bring 4 cups of water to a rolling boil in a medium saucepan.
  4. Whisk the polenta into the water. Continue whisking until the polenta has thickened slightly and there are no lumps.
  5. Reduce the heat to medium low and cook for an additional 20-30 minutes or until the polenta is tender.
  6. Turn off the heat. Stir in the sour cream and season to taste with salt and pepper. Keep warm while you make the shrimp.
  7. Toss the shrimp in a bowl with the olive oil, chipotle powder, salt and pepper and transfer it to a large, rimmed sheet pan. Make sure the shrimp are in a single layer with a little space between them.
  8. Place the shrimp under the broil and cook until they are pink and just firm, about 3 minutes.
  9. Ladle some of the polenta into 2 serving bowls. Top with handful of baby spinach and divide the shrimp evenly and arrange on top the spinach.
  10. Serve immediately.
In Lunch & Dinner, No Added Sugar, Vegetarian Tags easy dinner recipes, polenta, shrimp, Valentine's Day recipe
2 Comments
Fennel-Blood-Orange-Salad-with-Almonds-Set-the-Table.jpg

Blood Orange & Fennel Salad with Almonds

Rachael White February 5, 2014

When Brad and I moved to Tokyo in 2008, all I could do to keep from curling up in a ball of homesickness was to look for things about Japan that reminded me of my Midwestern home. Let me just say that finding similarities between Minnesota and Japan is not an easy task. Sometimes I would find ways of preparing food that reminded me of home. Occasionally I would see a sign for Minnetonka Moccasins that would make me feel like I still had a connection to my home state in the midst of the strange new surroundings in which I now found myself.

Fennel-and-Blood-Orange-Salad-Set-the-Table.jpg

I had an inkling moving to Japan might be difficult in the beginning. It was half way across the globe, after all. What I didn't expect was having similar feelings after moving to Denver, Colorado. Reverse culture shock didn't hit right away. We were so busy moving and taking care of our then 6 month old son. But when it did hit, the shock was strong. And it is still lingering. I find myself searching for anything that comes even remotely close to our life in Tokyo. Typically this means trying to find the perfect bowl of ramen, the best sushi, and perfectly a Japanese curry recips. This is easier said than done because, in the case of food, Japan always does it best.

Fennel-Blood-Oranges-Set-the-Table.jpg

What does all of this have to do with a fennel and blood orange salad? Nothing at all. Except that when I made this salad all I was doing was thinking of life in Japan. That previous life consumed my thoughts for an entire day. That's the way it goes, I guess.

Blood-Orange-Segments-Set-the-Table.jpg

It is also possible that I am using this salad as a reset button. Both to reset my weekly eating habits and to start with something clean and fresh in my mind. Whatever the motivation, I was pleased to have something fresh and bright on my plate. If you haven't tried shaved fennel with citrus, I encourage you to get on that right now. This is the perfect time of year for blood oranges, grapefruit, Meyer lemons... And I think with all the snow and negative degrees happening out there, some vitamin C might be just what we all need.

Fennel-Blood-Orange-Salad-Set-the-Table.jpg

So here's to salad. And citrus. And reverse culture shock. And reset buttons.

Blood Orange & Fennel Salad

Ingredients

  • 1 medium fennel bulb
  • 3 blood oranges
  • 1/4 cup whole roasted almonds, roughly chopped
  • Juice of 1 blood orange (you should have about 1/3-1/2 cup but if you are short, supplement with regular orange juice)
  • 1 tablespoon rice vinegar
  • 1/2 cup olive oil
  • salt to taste

Instructions

  1. Using a sharp knife or mandolin, save the fennel bulb. Place in a large bowl.
  2. Peel the blood oranges and use a pairing knife to cut segments. Simply take the knife and cut on either side of each membrane (the part of the orange that shows you where each segment is). Arrange the segments on top of the shaved fennel.
  3. Sprinkle the salad with the chopped almonds.
  4. Next, make the vinaigrette by combining the orange juice, vinegar, olive oil and salt in a small bowl. Whisk until emulsified and drizzle over the salad just before serving.
In Lunch & Dinner, Sides + Condiments, Vegetarian Tags almonds, blood oranges, citrus, fennel, healthy recipes, salad
5 Comments
← NewerOlder →

Search Posts


Featured Posts

Summary Block
This is example content. Double-click here and select a page to feature its content. Learn more
Featured
Mar 16, 2026
Cursus Amet
Mar 16, 2026
Mar 16, 2026
Mar 9, 2026
Pellentesque Risus Ridiculus
Mar 9, 2026
Mar 9, 2026
Mar 2, 2026
Porta
Mar 2, 2026
Mar 2, 2026
Feb 23, 2026
Etiam Ultricies
Feb 23, 2026
Feb 23, 2026
Feb 16, 2026
Vulputate Commodo Ligula
Feb 16, 2026
Feb 16, 2026
Feb 9, 2026
Elit Condimentum
Feb 9, 2026
Feb 9, 2026
Feb 2, 2026
Aenean eu leo Quam
Feb 2, 2026
Feb 2, 2026
Jan 26, 2026
Cursus Amet
Jan 26, 2026
Jan 26, 2026
Jan 19, 2026
Pellentesque Risus Ridiculus
Jan 19, 2026
Jan 19, 2026
Jan 12, 2026
Porta
Jan 12, 2026
Jan 12, 2026

Powered by Squarespace