Quantcast
  • Contact
  • Portfolio
  • Subscribe
  • Recipes
Menu

Set the Table Photography

photography
  • Contact
  • Portfolio
  • Subscribe
  • Recipes
×
Orange-Walnut-Russian-Tea-Cakes-Set-the-Table.jpg

Orange-Walnut Russian Tea Cakes

Rachael White December 1, 2014

I have so many memories of lying in bed at night at the beginning of winter hoping that in the morning would bring a blanket of fresh snow. When it happened, there was an excitement that started deep in my belly and spread in excited tingles all the way to my finger tips. I always knew there was snow before even glancing out the window that there was snow because the light changed completely. It always felt new and fresh after weeks of golden autumn sun. The first snow of the season calls for something special. Hot chocolate for breakfast, cookies baking in the oven, and Christmas music on in the background. We had a day like that a while back, and I immediately took advantage by spending the morning making Orange-Walnut Russian Tea Cakes with my favorite little kitchen assistant.

Russian-Tea-Cakes-with-Pecans-Orange-Zest.jpg

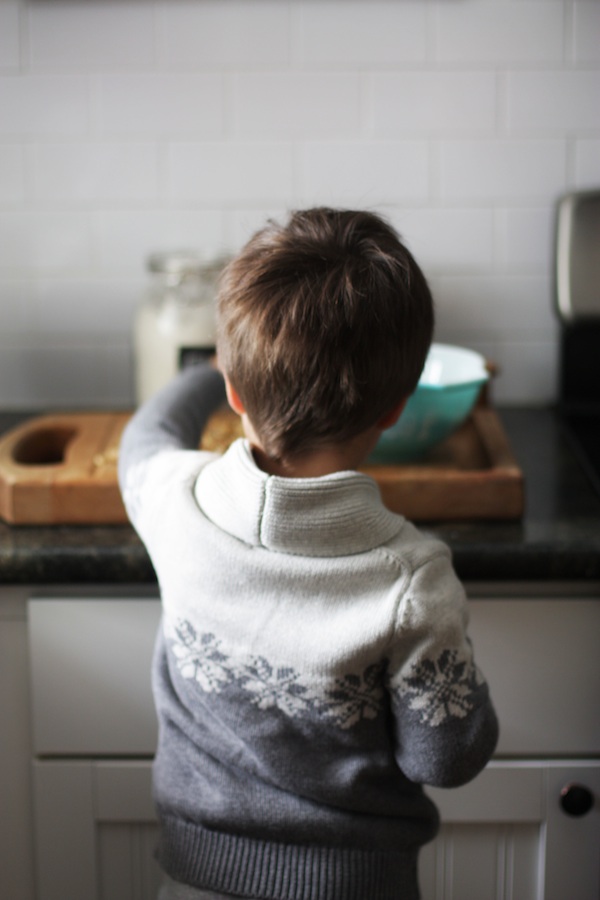
We also wore wintery sweaters. You can't have a snow day without the proper attire, am I right?

Snow-Day-Cookies-Set-the-Table.jpg

My mom used to make Russian Tea Cake cookies around Christmas time and I remember the way the powdered sugar stuck to my fingers. Something about their snowball appearance made it seem like winter was officially official. I took my mom's recipe and updated it a little with the addition of fresh, bright orange zest. The orange in combination with the walnuts combines all the wonderful things about winter in one tasty little cookie. They are easy for kids to help with and make the perfect introduction to holiday cookie baking season.

Russian-Tea-Cakes-with-Orange.jpg
Russian-Tea-Cake-Making-Set-the-Table.jpg

Between the snowflakes floating softly outside the window and this sweet little boy helping me make sweet treats, this snow day was the best thing ever. I'm wishing extra hard for more days like this in the coming weeks.

Tea-Cakes-with-Walnuts-Orange-Set-the-Table.jpg

Orange-Walnut Russian Tea Cakes

Makes 2 dozen cookies

  • 1 cup butter or margarine, room temperature
  • ½ cup powdered sugar
  • 1 teaspoon almond extract
  • 2 ⅓ cups all-purpose flour
  • 1/4 teaspoon nutmeg
  • ¾ cups roughly chopped walnuts
  • zest of one large orange
  • ¼ teaspoon salt
  • 1-2 cups powdered sugar for rolling

1. Heat oven to 400ºF. 2. Mix butter, 1/2 cup powdered sugar and the almond extract in a large bowl. Stir flour, nutmeg, walnuts, zest and salt in another bowl. Add the dry ingredients to the butter and sugar mixture until the dough comes together. 3. Gently roll dough into 1 1/2 inch balls. Place them on a parchment lined cookie sheet with about an inch of space between each cookie. 4. Bake 10 to 12 minutes. Keep a close eye on the cookies so they don't turn golden on top- that means they're overcooked! Cool the cookies for about 5 minutes on a cooling rack. 5. Roll warm cookies in powdered sugar and cool them completely on wire rack before arranging on a plate. If the first pass through the powdered sugar didn't quite stick, you can roll them a second time once they have cooled.

In Dessert, Kid Friendly Tags christmas cookies, Christmas recipes, holiday baking, holiday recipe
7 Comments
Healthy-Pumpkin-Muffins-Set-the-Table.jpg

Olive Oil Pumpkin Muffins

Rachael White November 6, 2014

Today was one of those perfect days. Beautiful weather, a happy, super sweet almost-3-year-old, and a morning full of moments that made me want to freeze time. From the aggressive movements of the baby inside of me to the sweet smiles and kisses of my not-such-a-baby boy, I melted over and over again. We passed by a huge Christmas tree while we were out running errands and the icing on the cake moment of the day was watching Riley's face light up as a huge smile spread across his face and he covered his mouth with a very small, chubby, toddler hand. It made me not at all sorry that Christmas is all around us already. Even though the holidays seem to have exploded earlier than ever, I'm still holding on to pumpkin season. These super healthy olive oil pumpkin muffins are the perfect way to indulge without any guilt. These tasty treats are full of vitamin-packed pumpkin, heart-healthy olive oil and are sweetened with maple syrup and honey, which are significantly healthier options than white or brown sugar.

Bonus: they are kid-friendly!

Olive-Oil-Pumpkin-Muffins-Set-the-Table.jpg

This recipe is largely based on the olive oil zucchini muffins Lindsay from Pinch of Yum posted over the summer. (Riley asks for them every time we go to the park. He assumes park time equals zucchini muffin time.) Needless to say, we fell in love with those muffins and I was sure we could create a fall version with pumpkin in place of zucchini. I added a lot of pumpkin spice seasoning plus a little extra cinnamon (I blame being pregnant for that one- I cannot get enough cinnamon), which make these muffins the ideal autumn treat. I can say from personal experience that they are equally delicious with a cup of coffee in the morning as they are with a cup of chamomile tea at night.

Olive-Oil-Maple-Pumpkin-Muffins-Set-the-Table.jpg

If you have been over-indulging in pumpkin spice lattes and baked pumpkin-y things at the local coffee shop and need a sugar break, these olive oil pumpkin muffins are the answer. Heck, you might as well enjoy them with my lighter pumpkin pie latte! Double pumpkin whammy. You're welcome.

Olive Oil Pumpkin Muffins

Makes 12-15 muffins

Recipe adapted from Pinch of Yum's Honey & Olive Oil Zucchini Muffins

  • 1 cup pumpkin purée (canned or homemade)
  • 2 eggs
  • 2 teaspoons vanilla
  • 1 cup olive oil
  • 1/2 cup maple syrup
  • 1/4 cup honey
  • 1 1/2 cups whole wheat flour
  • 1 1/2 cups all-purpose flour
  • 2 teaspoons baking soda
  • 2 teaspoons baking powder
  • 1/2 teaspoon salt
  • 2 teaspoons cinnamon
  • 2 teaspoons pumpkin spice seasoning

Preheat the oven to 350 degrees Fahrenheit. Line a regular muffin tin with liners and set aside.

Combine the pumpkin, eggs, vanilla, olive oil, maple syrup and honey in a large bowl. Whisk until smooth.

In another bowl, whisk together the flours, baking soda, baking powder, salt, cinnamon and pumpkin spice seasoning.

Sprinkle the dry ingredients over the wet ingredients and fold until just combined.

Fill each muffin liner 2/3 of the way full of batter. Bake for 15-18 minutes until the muffins have puffed up nicely and developed a light golden crust.

In Breakfast & Brunch, Kid Friendly, Vegetarian Tags baking, fall baking, muffins, pumpkin
4 Comments
Mini-Pizzas-with-Red-Pepper-Pizza-Sauce-Set-the-Table.jpg

Frozen Mini Pizzas

Rachael White October 17, 2014

Sometimes frozen mini pizzas are all you can muster for a meal. That's been the story for us the past few days.

This week has been a long one. Every day seems to drag by and move slower than the day before. We lost a college friend in a tragic accident. It's hard to wrap your mind around the fact that someone, who was perfect healthy and well this time last week, is no longer here. The silver lining through it all has been this: realizing my college community is alive and well nearly 10 years later. The friends I at Luther College in Decorah, Iowa have made this week bearable in the way they have come together to remember the laughter and wonderful joy we shared together. Remember to appreciate your friends each and every day. Give your loved ones extra hugs. Don't take important people in your life for granted.

Mini-Bagel-Pizzas-Set-the-Table.jpg

Honesty time: I'm sure I haven't been the most present mother lately, which is probably why the level of picky-eating seems to have risen exponentially. Or maybe it is just all part of the toddler process. Either way, I'm working on keeping food on hand that are sure to please on the worst of days. These mini pizzas, made with mini whole wheat bagels, are topped with a roasted red pepper pizza sauce. It's not as fancy as it sounds. Basically, I took store-bought pizza sauce, poured it in the food processor, and added 3 large roasted red peppers. A few pulses later, I was left with a bright red, super flavorful and vitamin-packed sauce that was perfect for my little hunger-striking-2-year-old.

Roasted-Red-Pepper-Pizza-Sauce-Set-the-Table.jpg

There isn't a trick to making these freezer-friendly aside from this: freeze the pizzas on a large sheet pan before transferring them to a freezer bag. I let mine freeze overnight but I think 4 hours would be sufficient. Once they are frozen, you just take them out as needed and bake them in the oven for a quick 12 minutes and serve. Easy snack? Check. Pizza dinner? Check.

Mini-Bagel-Pizzas-for-the-Freezer-Set-the-Table.jpg

I don't know if I've learned this after almost 3 years as a parent or if this knowledge just comes with age, but I'm realizing that preparing for days when all you want to do is stuff your face with greasy take-out and ice cream is super important. Having healthy choices like this at the ready makes even the roughest weeks feel a little less brutal.

Frozen Mini Pizzas

Ingredients

  • 10 mini whole wheat bagels, halved
  • 1 cup pizza sauce
  • 3 large jarred roasted red bell peppers, drained
  • 1 cup shredded mozzarella cheese

Instructions

  1. Place the bagel halves on a rimmed baking sheet, cut side up. Set aside.
  2. In a food processor, add the pizza sauce and red peppers. Pulse 5 or 6 times until well combined.
  3. Spoon the sauce on top of the bagels.
  4. Sprinkle the bagels with cheese and press down lightly so the cheese comes into contact with the sauce (this will help keep the cheese in place).
  5. Put they tray in the freezer for at least 4 hours and up to 8 before transferring to a freezer bag.
  6. When ready to make the pizzas, preheat the oven to 375 degrees Fahrenheit. Line a baking sheet with parchment paper and place desired number of pizzas on the paper. Bake 12-15 minutes or until the cheese is melted and just turning golden on top.
In Kid Friendly
1 Comment
How-to-Make-Pumpkin-Puree-Set-the-Table.jpg

How to Roast a Pumpkin + Pumpkin Puree

Rachael White October 6, 2014

The other day, I was thinking about what it is that makes autumn so wonderful. A little later that day, as I put root vegetables, acorn squash, and apples in my shopping cart, I realized that there is such a feeling of comfort during this season. No matter what the day brings, you can always find a comforting soup, warming cup of tea, a soft blanket, or a pumpkin-spice candle to lift your spirits. Another reason I love fall is because there is always something that need roasting, baking, or braising in the oven that was ignored all summer. I love turning the oven on first thing in the morning when the air is cold in preparation for a day of baking or roasting. Even without knowing exactly what I'm going to make, I set the temperature to 350 F and find something to set on the middle rack.

Today, I roasted a pumpkin to make some puree now that the grocery stores are filled with sugar pumpkins. I love buying 3 or 4 of these little pumpkins to set on the table or in a window sill for decoration. Then, I use them as needed and replace them with things like bowls of apples or winter squash. Multitasking decorations. It's the way to go.

If you've never tried making your own pumpkin puree, I highly recommend it. The process is ridiculously easy and results in a pumpkin puree that is far fresher and more flavorful than anything you'll find in a can.

Here are the easy steps showing you how to roast a pumpkin and turn it into puree!

Cut off the stem:

It is much easier to cut the pumpkin in half if you get rid of the stem, so use a SUPER sharp knife and carefully cut off the 'lid'.

Roasted-Pumpkin-Tutorial-Set-the-Table.jpg

Scoop out the seeds:

Scoop out the stringy pulp and the seeds using an ice cream scoop or a large spoon. Save the seeds if you'd like to toast them, but discard the pulp.

How-To-Roasted-Pumpkin-Set-the-Table.jpg

Roast the pumpkin:

Preheat the oven to 350 degrees Fahrenheit and place the pumpkin halves, cut side down, on a parchment lined baking sheet.

How-to-Roast-a-Sugar-Pumpkin-Set-the-Table.jpg

Bake for 45 minutes or until you can easily pierce the skin of the pumpkin with a fork or a toothpick.

How-To-Roast-a-Pumpkin-Set-the-Table.jpg

Let cool, then scoop:

Let the pumpkin halves cool by setting the baking sheet on a wire rack. When they are cool enough to handle, use a spoon to scoop and scrape the flesh of the pumpkin out of the skin.

Roasted-Pumpkin-How-To-Set-the-Table.jpg

Puree:

Transfer the pumpkin flesh to a blender and pulse until smooth. If you end up with a dry pumpkin, add a tablespoon or two of water to the blender. I typically don't need to add any additional liquid and only do so if absolutely necessary so I can use the puree in baking recipes without any problems.

Pumpkin-Puree-Recipe-Set-the-Table.jpg

And that's all there is to it! Easy. Oh so easy. You can use the puree in anything from pancakes to soup to a homemade pumpkin pie latte.

I'll have more pumpkin recipes for you this week using this puree, so make some ASAP and get ready for some pumpkin deliciousness!

In Kid Friendly, No Added Sugar, Vegetarian Tags autumn, pumpkin, tutorial
3 Comments
Apple-Cheddar-Scones-Set-the-Table.jpg

Apple Cheddar Scones + Tillamook Trip

Rachael White September 12, 2014

Apple Cheddar Scones? Yes. They are amazing. The sweet, tart green apple and gooey, warm pockets of sharp cheddar are a match made in heaven. My husband always asks me where I get the inspiration for my recipes. For this particular recipe, the inspiration came from a brief visit to Oregon when I was lucky enough to attend an event hosted by Tillamook with a group of fellow food bloggers. We spent a lot of time eating cheese and ice cream together and this pregnant lady was very happy about all of that. I think I filled my calcium quota for the next 3 months. Aside from eating all of the things, we also learned a lot about how their company works. We met some of their key employees who work to make sure the products they put out on the shelves are of the highest quality. We were able to soak in the beauty that is the Oregon coast. And perhaps most importantly, we were able to make a personal connection with a company that has truly proven itself over and over again throughout the years. I didn't really have one specific company I looked to for cheese, ice cream, or yogurt, but now I do.

10347633_728807243859952_6797496646842859977_n.jpg

Seriously. So. Much. Cheeeeeeeese.

I'm convinced a huge reason for the balanced flavor and consistent quality of Tillamook's cheese is thanks to this guy:

Tillamooks-Master-Cheesemaker-Set-the-Table.jpg

This is Dale. He has been working at Tillamook for 45 years. Yep. You read that correctly. FORTY-FIVE YEARS. He knows what he is doing and takes his cheese very seriously. That's my kind of guy.

We were also able to visit Jill who is the Product Quality Manager. All I have to say is this: if I'm ever in a taste-testing competition I don't want to be up against her. Her taste buds are seriously talented. Yes, that's absolutely possible.

After our tour at the factory, we headed to the coast where we got to check out our room at the Inn at Cape Kawanda. If Brad and I get a chance to take a parents only vacation any time soon I want it to happen here. The rooms have gorgeous views of the ocean that are enchanting (perhaps more so) despite the heavy fog that settled over the area while we were there.

10460788_728807343859942_4210411382251668580_n.jpg

That night, we enjoyed a pretty amazing dinner on the ocean. And by dinner I mean I filled myself up on the incredible appetizers and didn't have room for an actual dinner. I mean, look at these oysters. Those plus a cheese plate, some amazing fritters, and clam chowder were enough to send me over the edge.

10610892_728807303859946_1364551725644313567_n.jpg
10544303_728807277193282_4245641085881372810_n.jpg
Tillamook-Oceanside-Dinner-Set-the-Table.jpg

Of course, I had plenty of room for dessert: Tillabars. Oh man. Enjoying one of those while sitting around a campfire with a group of talented women who I grew to greatly admire with a pretty incredible ocean backdrop was just about perfect.

The following day, I woke up early to sit on the balcony, drink some coffee, and enjoy my last look at the view from my room. It was lovely.

10615453_728829627191047_4734055782485623093_n.jpg

Then, we visited one of the Tillamook dairy farms and spent some time with a lot of these ladies:

Tillamook-Dairy-Farm-Set-the-Table.jpg

They were super curious, especially when my baby bump got close enough to the fence. It is possible that I flew home that night with a big, muddy cow nose print on my shirt directly over my belly button.

Here's the deal: running a dairy farm, or any farm for that matter, is a lot of work. The family who ran this particular farm were incredible. They love the cows and are full of knowledge about how to take care of their cows starting at birth. I am still in total awe of their dedication and ability to dedicate their lives to these animals.

Needless to say, I fell in love with Oregon thanks to this Tillamook Blogger Summit.

And I fell even more in love with their cheese.

And yogurt.

And ice cream.

When I came home, I went straight to Costco and bought a huge block of Tillamook Sharp Cheddar and got to work using it in any way I could imagine. These scones are my favorite thing so far. They are full of fall flavor thanks to the apples and a little sprinkle of nutmeg with pockets of gooey, melty cheese in each bite.

Apple-Cheddar-Scone-Recipe-Set-the-Table.jpg

Tillamook sharp cheddar is really the best choice for cheese in this recipe. The sharpness is key. No mild or medium cheddar here, folks!

Apple-Sharp-Cheddar-Scones-Set-the-Table.jpg

Apple Cheddar Scones

Serves 8

Total time: 20 minutes

Ingredients

  • 2 cups all-purpose flour
  • 1 tablespoon baking powder
  • 3 tablespoons sugar
  • 1/2 teaspoon salt
  • 5 tablespoons chilled, unsalted butter cut into 1/4 inch cubes
  • 1 granny smith apple, peeled and cut into 1/4 inch cubes
  • 8 oz sharp cheddar cheese, cut into 1/4 inch cubes
  • 1 cup heavy cream

Instructions

  1. Preheat the oven to 425 degrees Fahrenheit.
  2. In a large bowl, whisk together the flour, baking powder, sugar, and salt.
  3. Scatter the butter over the flour mixture and use your hands to work it into the dry ingredients until it resembles wet sand with some pieces remaining pea-sized.
  4. Stir in the apple and cheese cubes and mix to coat them.
  5. Stir in the heavy cream with a fork until the mixture is just combined.
  6. Turn the dough onto a work surface and knead together until there are no dry spots and the dough just comes together.
  7. Pat into a circle about 8 inches in diameter.
  8. Cut into 8 triangles and place on a parchment lined baking sheet.
  9. Bake for about 13 minutes or until golden brown on top.

Notes

This recipe is based on the cream scones recipe from Cook's Illustrated: Baking. If you don't own that book, GET IT NOW.

In Breakfast & Brunch, Kid Friendly, This & That Tags apples, cheese, easy baking, fall recipe, Tillamook
5 Comments
Shrimp-Spinach-Spaghetti-Set-the-Table.jpg

Citrusy Shrimp & Spinach Spaghetti

Rachael White September 3, 2014

Being pregnant for a second time has me thinking a lot about the different stages I've gone through with my son. The first weeks and months were so difficult that I actually didn't think I could do it. He cried from 3pm to 3am every day for a month. His naps didn't last any more than 15 minutes at a time and happened once or twice during the day. I honestly felt like there was nothing I would ever be able to do to make him happy. Some call it colic, some say it's indigestion, and I still don't know exactly why that phase was so hard. In hindsight, I know there were things I needed to do to take care of myself. Eating enough was number one. Yes, the baby was crying and I wanted to crawl in a hole just to get some sound sleep, but taking 20 minutes to make a decent meal for myself was not going to change any of that. What those 20 precious minutes would do is help me have muster the strength to make it, with at least an ounce of grace, through a very trying time.

citrusy-shrimp-and-spinach-spaghetti-Set-the-Table.jpg

Yes, that was a hard time. But we have a healthy little boy who makes those first months totally worth it each and every day. He sleeps like a dream (worth more than gold if you ask me), gives the best hugs and kisses, loves bugs and "creatures" he finds in the backyard, and talks without stopping during every waking moment, leaving me with memories at the end of the day of the hilarious, and sometimes quite insightful things, I was blessed to have him share with me.

Shrimp-Citrus-Oil-Set-the-Table.jpg

Because I know what we could be facing with another little one on the way, the good and the difficult, I have been working on an arsenal of meals that are largely hands off and come together quickly. This citrusy shrimp & spinach spaghetti is the perfect 20 minute meal that is comforting, healthy, and so easy to toss together. In addition to all of that, it is versatile. Substitute spinach with chard or kale. Use whole wheat or brown rice spaghetti. Add shredded rotisserie chicken instead of shrimp. The possibilities are endless!

And a bonus at our house: this one is picky-toddler approved!

Citrusy-Shrimp-Spinach-Spaghetti-Recipe-Set-the-Table.jpg

We are now at the half-way point of this pregnancy and I'm starting to feel all of the feels there are to feel about having a new baby. With how much we love Riley, it's hard to imagine how it will feel to have two littles to love. Heart explosions will for sure be happening on the regular around here!

HELP: In my quest for easy meals, I'd love to hear what your favorites are! Links are welcome in the comments below!

Citrusy Shrimp & Spinach Spaghetti

Serves 4

Total time: 20 minutes

Ingredients

  • 1 lb spaghetti
  • 2 tablespoons fresh squeezed orange juice
  • 1 tablespoon fresh squeezed lemon juice
  • 1/4 cup olive oil
  • 1 lb peeled and deveined shrimp
  • 4 cups baby spinach
  • salt & freshly ground black pepper
  • grated parmesan cheese

Instructions

  1. Preheat the oven to 450 degrees Fahrenheit.
  2. Bring a large pot of salted water to a boil. Add the spaghetti and cook until al dente, 8-10 minutes. Before draining, reserve 1 cup of pasta water and set aside.
  3. Meanwhile, combine the orange juice, lemon juice and olive oil in a jar with a tight fitting lid and shake to combine.
  4. Put the shrimp in a large bowl and toss with half the olive oil mixture. Spread the shrimp on a baking sheet lined with foil and roast for 6 minutes or until pink and just cooked through.
  5. In a large bowl, toss the spaghetti with the shrimp and the remaining citrus oil. Add the spinach and season with salt and pepper.
  6. Scoop into serving bowls and sprinkle with grated parmesan cheese.
In Kid Friendly, Lunch & Dinner Tags 20 minute meals, easy dinner recipes, easy weeknight meals, Pasta, shrimp
4 Comments
← NewerOlder →

Search Posts


Featured Posts

Summary Block
This is example content. Double-click here and select a page to feature its content. Learn more
Featured
Aug 5, 2025
Cursus Amet
Aug 5, 2025
Aug 5, 2025
Jul 29, 2025
Pellentesque Risus Ridiculus
Jul 29, 2025
Jul 29, 2025
Jul 22, 2025
Porta
Jul 22, 2025
Jul 22, 2025
Jul 15, 2025
Etiam Ultricies
Jul 15, 2025
Jul 15, 2025
Jul 8, 2025
Vulputate Commodo Ligula
Jul 8, 2025
Jul 8, 2025
Jul 1, 2025
Elit Condimentum
Jul 1, 2025
Jul 1, 2025
Jun 24, 2025
Aenean eu leo Quam
Jun 24, 2025
Jun 24, 2025
Jun 17, 2025
Cursus Amet
Jun 17, 2025
Jun 17, 2025
Jun 10, 2025
Pellentesque Risus Ridiculus
Jun 10, 2025
Jun 10, 2025
Jun 3, 2025
Porta
Jun 3, 2025
Jun 3, 2025

Powered by Squarespace