I've realized since we became a family of three that peaceful, happy moments like the ones we enjoyed this weekend, are increasingly important. Not just for my own spirit, but for the memories that will remain in Riley's mind. He is still very young, but making healthy habits out of play and family time will stay with him as he grows up. I know memories like these have stayed with me over the years.
So, whether you are looking for the perfect last-minute contribution to Easter Brunch or a special anytime breakfast for your family, you'll be glad to have this recipe for super easy, fast cinnamon rolls.
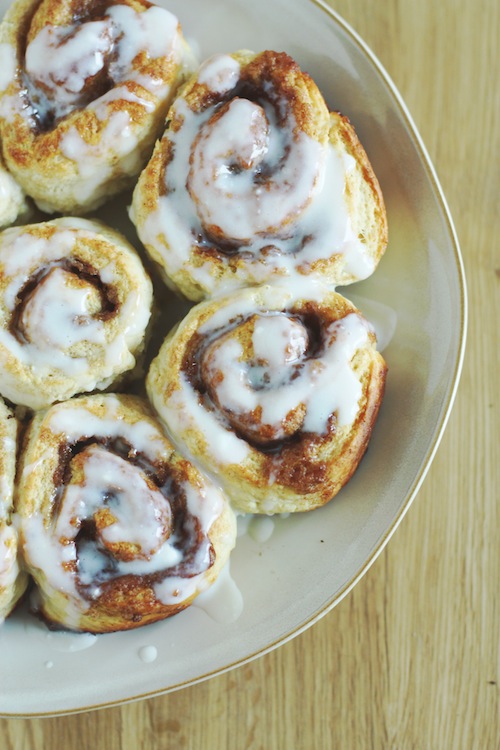
No-Rise Cinnamon Rolls
Recipe from Cook's Illustrated: Baking
1 Tablespoon unsalted butter, melted, for greasing the pan
Cinnamon-sugar filling
- 3/4 cup packed dark brown sugar
- 1/4 cup granulated sugar
- 2 teaspoons ground cinnamon
- 1/8 teaspoon ground cloves
- 1/8 teaspoon salt
- 1 tablespoon unsalted butter, melted
Biscuit Dough
- 2 1/2 cups unbleached all-purpose flour (Cook's Illustrated recommends King Arthur flour)
- 2 tablespoons granulated sugar
- 1 1/4 teaspoons baking powder
- 1/2 teaspoon baking soda
- 1/2 teaspoon salt
- 1 1/4 cups buttermilk
- 6 tablespoons melted butter, cooled
Place an oven rack in the upper-middle position. Preheat your oven to 425 degrees F. Take 1 tablespoon of the melted butter and pour it in a 9-inch nonstick cake pan. Brush the butter in the pan to coat. Set aside. Take a cooling rack and spray it with cooking spray. Set aside.
Make the cinnamon-sugar filling next by combining 1/4 cup sugar with the cinnamon, ground cloves, salt and 1 tablespoon melted butter. The mixture should look like wet sand. Set aside.
Next, make the dough. Whisk the flour, 2 tablespoons sugar, baking powder, baking soda, and salt in a large bowl. In a separate small bowl, whisk the buttermilk and 2 tablespoons melted butter together. Add the buttermilk mixture to the dry ingredients and stir until the liquid is absorbed. The dough will look shaggy but that's a good thing. Turn the dough onto a floured surface and knead until it just becomes smooth.
Use your hands to pat the dough into a 12 by 9 inch rectangle and brush it with 2 tablespoons melted butter, leaving a 1/2-inch border around the edges. Spread the cinnamon sugar filling over the melted butter that you just brushed on the dough in an even layer. Press the filling firmly onto the dough. Then, use a spatula or pastry scraper to loosen the dough from the work surface. Beginning on one of the 12-inch sides, roll the dough into a log and press it down lightly. Pinch the seam to seal it, then place the log seam side down. Cut the log into 8 pieces and lightly flatten each roll. This will help seal the edges and keep the filling where it's supposed to be.
Begin by placing one roll in the center of your pan, then place the remaining 7 rolls around it. Brush the tops with the remaining 2 tablespoons butter. Bake until the edges are golden brown, about 23-25 minutes. Loosen the rolls from the pan with an offset spatula or a butter knife. Put on some oven mitts and place a large plate over the pan. Invert the rolls onto the plate and then invert them again onto the cooling rack. Allow the rolls to cool for 5 minutes before drizzling with the icing.
Serve warm topped with the glaze.
Powdered Sugar Glaze
1 cup powdered sugar
1 Tablespoon milk
1/2 teaspoon vanilla extract
Combine all ingredients in a small bowl and whisk until smooth.