Quantcast
  • Contact
  • Portfolio
  • Subscribe
  • Recipes
Menu

Set the Table Photography

photography
  • Contact
  • Portfolio
  • Subscribe
  • Recipes
×
Whole-Wheat-Peach-Muffins-Set-the-Table.jpg

Healthy Peach & Oat Muffins

Rachael White August 23, 2014

Peach season has arrived and I am SO EXCITED. I bought an 18 pound box of peaches from our church (all the proceeds go to our youth group which is so awesome) and they are absolutely perfect. I've been eating 2 of them pretty much every day- one with breakfast and one after dinner. As for the rest of the bunch, I'm finding new ways to showcase their perfect peach flavor without overcooking/over-sugaring them. Just the other day I was telling my mom how I find it a little sad to make something like jam out of such lovely tasting fruit. (Am I strange for feeling that way? Yes? Well OK then.) These healthy peach and oat muffins are just about the best thing ever. Healthy and with just a hint of what's around the corner (spoiler alert: it's FALL) thanks to a cinnamon-sugar coating on top.

Healthy-Peah-Muffins-Set-the-Table.jpg

These muffins came at a great time for me because I've been trying to work more whole grains into my diet. Specifically, I've been trying to add more wheat germ into my meals. Sprinkled on top of peanut butter toast: yum. Added to a peanut butter & banana smoothie: yum. Stirred into this muffin batter: winner. The wheat germ along with a healthy amount of rolled oats and whole wheat flower make me feel pretty good about eating one of these with my yogurt in the morning or as a midday snack with a little chamomile tea.

Whole-Grain-Peach-Muffins-Set-the-Table.jpg

Perhaps my favorite part about these peach muffins is that they allow the fruit to really show off. When you bite into the nutty bread of the muffin along with a juicy, sweet chunk of peach it's like a Ratatouille moment.

If that doesn't convince you to make these asap I'm not sure what will.

So get to it!

Healthy Peach & Oat Muffins

Serves 12

Total time: 28 minutes

Ingredients

  • 1/2 cup all-purpose flour
  • 1/2 cup whole wheat flour
  • 3/4 cup rolled oats (not instant)
  • 1/4 cup wheat germ
  • 1/3 cup light brown sugar
  • 1/2 teaspoon salt
  • 2 teaspoons baking powder
  • 1 cup low-fat Greek yogurt
  • 1 egg
  • 1/2 cup unsalted butter, melted and cooled
  • 1 cup diced peaches (washed but not peeled)
  • 1/4 cup sugar
  • 1 tablespoon cinnamon

Instructions

  1. Line a muffin tin with liners or spray with cooking spray and preheat the oven to 400 degrees Fahrenheit.
  2. In a large bowl, combine the flours, oats, wheat germ, sugar, salt and baking powder. Whisk to combine.
  3. In a small bowl, combine the yogurt, egg, and butter. Whisk until smooth.
  4. Pour the wet ingredients over the dry ingredients and mix until no flour is visible.
  5. Stir in the peaches and fold them into the batter with a spatula.
  6. Use an ice cream scoop or large spoon to scoop even amounts of the batter into the muffin tins.
  7. Sprinkle the tops with the cinnamon and sugar mixture.
  8. Bake 16-18 minutes or until a toothpick inserted into the center of the muffins comes out clean.
  9. Allow the muffins to cool on a wire rack for at least 10 minutes before eating.
In Breakfast & Brunch, Kid Friendly Tags Colorado peaches, easy baking, healthy breakfast recipe, summer baking, toddler friendly recipes
2 Comments
Healthy-Baked-Apples-Muesli-Crisp-Set-the-Table.jpg

Healthy Baked Apples with Muesli Crisp (+ an announcement!)

Rachael White August 13, 2014

I'm having a little love affair with breakfast. It's the first thing I think about when I wake up in the morning and I always want something hearty, sweet, and involving cinnamon in some way. These healthy baked apples with muesli crisp are the perfect solution. I'm going to eat them every day once apples are in season for real. It's gonna have to happen. With a dollop of creamy Greek yogurt sweetened with honey pleaseandthankyou.

It's good that I'm obsessed with something so wonderfully healthy because I seem to be putting on a little weight. Can you tell?

Pregnancy-Announcement-Set-the-Table.jpg

Yep! Baby #2 is growing in that there bump and it wants all the comfort food in the universe (seriously, all of it. send mashed potatoes and gravy). 

We are so happy and thankful to have had a relatively problem-free pregnancy so far and cannot wait to welcome a new little one into our family! Riley is beyond excited to be a big brother and I love it when he walks up to me to bury his face in my growing belly. Sometimes, in the sweetest little voice, he says "Hi baby" and I melt in a puddle on the floor.

Whew! I'm so relieved to get that out there.

Now I can bombard you with my woes about morning sickness and crampy legs and heartburn, right? No? Not so much? OK.

Let's get back to these baked apples...

Baked-Apples-with-Muesli-Crisp-Set-the-Table.jpg

Quite a while ago, the lovely folks at Seven Sundays in Minnesota sent me some of their delicious muesli and my love affair with this easy breakfast item began. I've eaten it soaked overnight, warmed, sprinkled over yogurt, and straight out of a bowl with milk. You really can't go wrong. I've decided that my favorite flavor is the Vanilla Cherry Pecan. Chewy dried cherries, buttery, crunchy pecans, and a hint of vanilla basically creates a perfect start to the day. And the perfect topping for baked apples.

Seven-Sundays-Muesli-Set-the-Table.jpg

I simply halved an apple and scooped out the core with a melon baller, then sprinkled each half with a little tiny bit of brown sugar (which it doesn't really need, to be honest) and topped that with the muesli. The dressed up apples baked for 30 minutes, concentrating their naturally sweet flavor and toasting the muesli to perfection. When they came out of the oven, I sprinkled a little cinnamon over the crisp and scooped a spoonful of creamy honey Greek yogurt in the middle of each apple. Heaven.

Red-Delicious-Apple-Set-the-Table.jpg
Healthy-Baked-Apples-Set-the-Table.jpg

So, I'm going to continue stuffing these in my face because there's not a whole lot to feel bad about here.

You must make these. You MUST.

Healthy Baked Apples with Muesli Crisp

Serves 2

Total time: 35 Minutes

Ingredients

  • 1 apple (red delicious was, well, delicious...but use whatever you can find)
  • 1 teaspoon unsalted butter
  • 1 teaspoon brown sugar (optional)
  • 1/3 cup muesli (I used Seven Sundays Vanilla Cherry Pecan)
  • 1/8 teaspoon ground cinnamon
  • 1/3 cup honey or vanilla Greek yogurt

Instructions

  1. Preheat the oven to 350 degrees Fahrenheit.
  2. Begin by halving the apples lengthwise and scooping out the core (plus a little extra) with a melon baller.
  3. Smear the butter evenly on each apple and sprinkle with the brown sugar.
  4. Top with the muesli and bake for 30 minutes or until the apples are just tender but not mushy and the topping is golden.
  5. Remove from the oven and transfer to serving plates.
  6. Dollop with the Greek yogurt and eat immediately.
In Breakfast & Brunch, Dessert, Kid Friendly, No Added Sugar, This & That, Vegetarian Tags apples, healthy breakfast recipe, healthy dessert, muesli
5 Comments
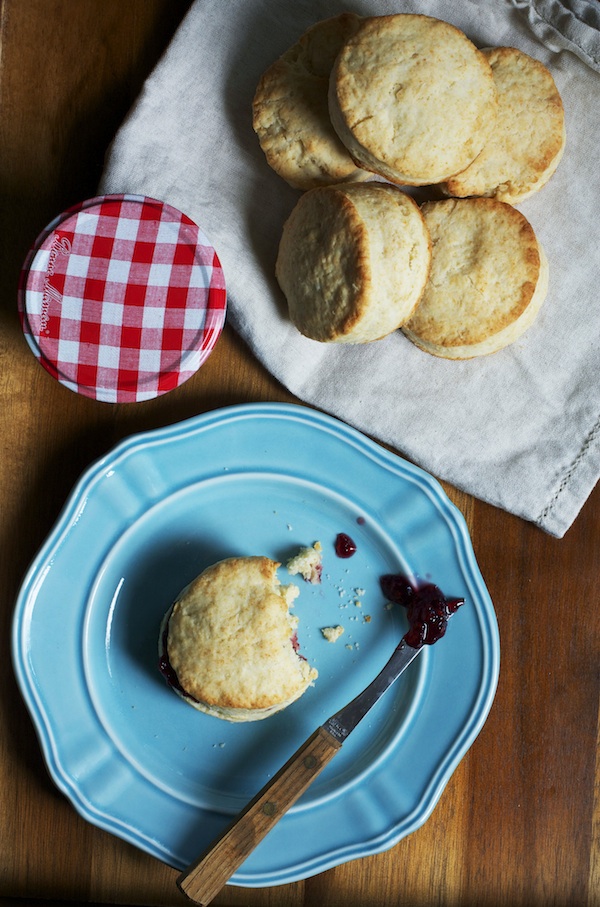
Cream-Biscuits-Set-the-Table.jpg

Easy Cream Biscuits

Rachael White June 12, 2014

I've developed a bit of an obsession with cream biscuits. Truthfully, I didn't love eating them when I was kid the way the rest of my family did. Whenever we went to Tennessee to visit my grandparents, we would wake up to the smell of freshly baked biscuits at 4:30am. My grandpa's internal clock was a little off. By the time we were all awake and ready to eat, it was at least 8am (maybe later during those sleepy teenage years) and the biscuits were freezing cold. I can't recall a time when I actually got to eat one of my grandfather's biscuits just out of the oven.

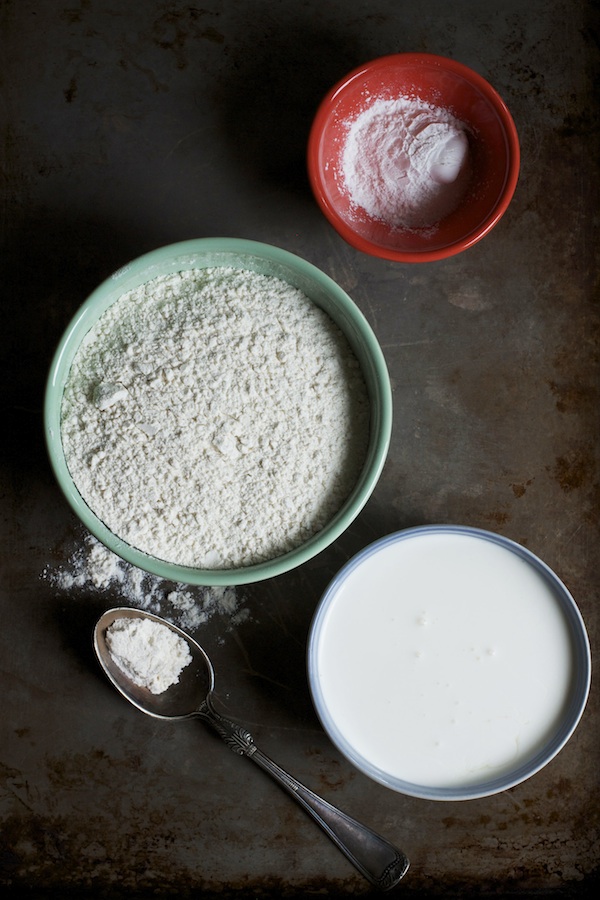
Biscuit-Ingredients-Set-the-Table.jpg

While my experience with biscuits as a kid may not have been the greatest, mostly because I was too lazy and didn't know what I was missing, I still have this need to eat a good biscuit every now and then. I've really loved making cream biscuits the most because I usually have all the ingredients on hand and I don't have to mess with butter. For a self-proclaimed non-baker like myself that is a relief. After a lot of practice, I've gotten pretty good at making cream biscuits that rise like a charm and have a flaky, rich crumb.

And I get to eat them hot out of the oven.

Biscuit-Dough-Set-the-Table.jpg

My favorite way to enjoy a freshly baked biscuit is with a slather of my mom's homemade strawberry jam. Or, if I don't happen to have anything that good, I go with a good store bought strawberry or raspberry preserve. Simple, delicious comfort food at its best. I may not use bacon grease in my biscuits the way my grandpa did, but I think about him every time I cut the biscuits out. I'm relatively sure he's peaking over my shoulder trying to convince me to do it his way, which also means using an entire stick of room temperature butter mixed with jam as the main course.

True story. That was his favorite snack.

Food should remind us of people and places that make us happy. Biscuits take me to Cookeville, Tennessee with my sweet grandparents, my giggly little sister, and lazy days spent climbing trees and tying June bugs to a string and taking them for a walk.

Easy Cream Biscuits

Makes 6-8 biscuits

Total time: 20 minutes

Ingredients

  • 2 cups all-purpose flour
  • 2 1/2 teaspoons baking powder
  • 1 teaspoon salt
  • 1 teaspoon sugar
  • 1 1/2 cups heavy cream

Instructions

  1. Preheat the oven to 425 degrees Fahrenheit and line a baking sheet with parchment paper.
  2. In a large bowl, whisk flour, baking powder, salt, and sugar together.
  3. Add the cream and stir just until the dough comes together. (It will be ragged at first but will smooth out as the dough is kneaded.)
  4. Turn dough onto a lightly floured surface and gently knead until the dough is mostly smooth. Pat into a 3/4-inch-thick round.
  5. Using a circular biscuit cutter cut out 3 or 4 rounds and place them on your prepared baking sheet. Bring the scraps together and pat out to 3/4 inches again. Repeat until all the dough is used. You should end up with 6-8 biscuits, depending on the size of your cutter.
  6. Bake the biscuits for 15 minutes or until golden brown on top.

Notes

I've noticed that here in Denver (high altitude) I have to adjust the amount of cream I use. Sometimes it inches nearer to 2 cups and sometimes 1 1/2 is plenty. Pay attention to what the dough is telling you. It should be ragged, which means it will be a bit wet and sticky but not so much that it sticks to your hands. And it shouldn't be so dry that you can't knead it into a smooth dough.

In Breakfast & Brunch Tags baking, biscuits, cream, easy baking
1 Comment
Chive-Blossom-Cheddar-Scrambled-Eggs-Set-the-Table.jpg

Chive Blossom & Cheddar Scrambled Eggs

Rachael White May 29, 2014

My garden looks like an actual garden this year. Last year, thanks to my black lab who thought I must have left all those plants in there by accident and decided to...ahem...rearrange them...my garden looked disorganized and random. That experience made me feel like a bit of a gardening dummy. Fortunately, this year has gone more smoothly, everything is in nice, neat rows, and has remained in their intended places. At this moment, the most beautiful thing in my garden is the chive plant that came back from last year. It is a vibrant green with purple poof-ball flowers in a halo around the top. It killed me a little to cut those pretty blossoms, even if it was only a few. However, if you know me even a little, you know that I'd do anything for eggs. So in the end, it was all worth it for the Chive Blossom & Cheddar Scrambled Eggs.

Perfect-Scrambled-Eggs-Set-the-Table.jpg

I made these perfectly creamy, fluffy scrambled eggs this morning while the air outside was still somewhat cool and I had a 2 year-old batman running around in circles in the kitchen. I whisked the eggs with a touch of milk, which some purists may not appreciate, but I think it adds an extra bit of luxurious creaminess. A bit of melted butter in a pan over very low heat, some slow but constant stirring with a spatula, and some small cubes of cheddar resulted in the most perfect scrambled eggs. A sprinkling of chopped chives and their blossoms made this an ideal spring breakfast.

Have you used chive blossoms before? They have a delicate and sweet onion flavor that is even more mild than the chive itself. Chive blossoms are lovely sprinkled over soup, dips, and salads. What would you do with a bunch of these purple beauties?

Chive Blossom & Cheddar Scrambled Eggs

Serves 2

Ingredients

  • 1 tablespoon unsalted butter
  • 4 eggs
  • 2 tablespoons whole or 2% milk
  • 1/4 cup small-cubed cheddar cheese
  • 1/4 cup chopped chives
  • 3 or 4 chive blossoms, roughly chopped
  • salt & pepper to taste

Instructions

  1. Melt the butter in a small pan over low heat.
  2. Meanwhile, whisk the eggs with the milk in a small bowl until smooth.
  3. Pour the eggs into the pan along with the cubed cheddar and let sit for 30 seconds before pushing around in the pan with a spatula.
  4. After about 3 or 4 minutes, the eggs should be mostly cooked through but still slightly wet. Remove the pan from the heat, continue to gently move the eggs around in the pan, and add the chopped chives.
  5. Transfer the eggs to a plate and sprinkle with the chive blossoms and salt and pepper to taste, if desired.
  6. Serve immediately.
In Breakfast & Brunch Tags fast recipes, scrambled eggs, Eggs, spring recipes, easy recipes, chives
2 Comments
10-Easy-Easter-Recipes-Set-the-Table.jpg

10 Easy Easter Recipes

Rachael White April 19, 2014

Easter is tomorrow! Yippee! I love Easter. It's always such a happy, joyful morning for religious reasons of course but also because it feels like the official 'Welcome Spring' day. When I was a kid, my mom dressed my sister and me in frilly pastel dresses, white lacy gloves and girly hats. Her Southern soul just needed her girls to be dressed to the nines on such an important holiday and, truthfully, I loved it.

I may not wear those things these days (I might get some strange looks if I did) but I do try to make some special dishes to help celebrate Easter with my family. Are you having trouble completing your Easter menu? Not to worry! I've collected 10 of my favorite easy Easter recipes from Set the Table and around the web to help you out!

1. Bourbon Thyme (with Meyer Lemonade) from Set the Table

It's Bourbon Thyme! | Set the Table

2. Japanese Bloody Mary from Set the Table

Japanese Bloody Mary | Set the Table

3. Herb Lemonade Station from HonestlyYUM

(PHOTO CREDIT: HonestlyYUM)

spring.inspiration.4.12

4. Roasted Carrot Soup with Greek Yogurt from Set the Table

Silky-Carrot-Soup-with-Tillamook-Farmstyle-Greek-Yogurt-Set-the-Table.jpg
Silky Carrot Soup with Tillamook Farmstyle Greek Yogurt | Set the Table

5. Miso Deviled Eggs from Set the Table

Miso Deviled Eggs | Set the Table

6. Lamb Bolognese from HonestlyYUM

(PHOTO CREDIT: HonestlyYUM)

Bucatini-lamb-bolognese

7. Ham & Sausage Hashbrown Egg Bake from Pinch of Yum

(PHOTO CREDIT: Lindsay from Pinch of Yum)

smithfield-ham-31
smithfield-ham-31

8. Magic Custard Cake from White on Rice Couple

(PHOTO CREDIT: Todd & Diane from White on Rice Couple)

magic-cake-new-500-1

9. No Rise Cinnamon Rolls from Set the Table

No-Rise-Cinnamon-Rolls1.jpg
No Rise Cinnamon Rolls

10. Lavender Latte from Turntable Kitchen

(PHOTO CREDIT: Turntable Kitchen)

I think serving coffee or tea at the end of a nice meal is a requirement. It provides time for everyone to relax and linger at the table just a little longer, talking about life and how full your tummy is and what you enjoyed the most about the meal. There is nothing like those last, sweet moments around the table reflecting on the time spent with those you love. This lavender latte is the perfect way to close a fabulous meal.

lavender_latte_top
lavender_latte_top
In Breakfast & Brunch, Dessert, Cocktails and Appetizers Tags Brunch, brunch recipes, Easter Menu, Easter recipes, holiday appetizers, holiday baking, holiday cocktails
Comment
Miso-Deviled-Eggs-Platter-Set-the-Table.jpg

Miso Deviled Eggs

Rachael White April 13, 2014

How is it almost Easter already? I mean, seriously. Time needs to slow the train down. Despite the fact that this holiday often sneaks up on me, Easter has always been one of my favorite holidays when it comes to food. We are creatures of habit on my fathers side of the family and our spread always includes my grandma's deviled eggs, my aunt Joanne's sticky caramel rolls, my uncle Steve's Bloody Marys and, of course, lots of locally made sausage and a glazed ham.

Truth time: When I growing up in Minnesota, I think I stuffed my face the most at Easter. To an embarrassing degree.

Ok, glad I got that off my chest. I feel like we are closer now, you and I. Yes?

Miso-Deviled-Eggs-for-Brunch-Set-the-Table.jpg

One of the reasons I love cooking is because I get to take pieces of my life and bring them together when they might otherwise remain separate entities. Here, I've taken deviled eggs, which will forever and always make me think of my grandmother, and added ingredients that reflect our time spent in Japan. White miso paste, hot mustard, and shichimi togarashi come together in these eggs to create something new for your Easter brunch. A couple of these alongside my Japanese Bloody Mary would be absolute perfection.

Miso-Deviled-Eggs-Recipe-Set-the-Table.jpg

Another change I made to these eggs was using Greek yogurt in place of mayonnaise. I think Greek yogurt gives the yolk mixtures a lighter, fluffier consistency that is a welcome contrast to the bold flavor of miso and hot mustard. I used Tillamook Farmstyle Greek Yogurt, which is mellow and creamy and absolutely perfect in these deviled eggs.

The icing on the cake? Fresh chives cut directly from my garden. Glorious.

About Tillamook Farmstyle Greek Yogurt

·         Tillamook Farmstyle Greek Yogurt is made with no artificial flavors, no artificial colors, no artificial sweeteners, no high fructose corn syrup and with the highest quality milk from cows not treated with artificial growth hormones.

·         Tillamook Farmstyle Greek is a thick, creamy and less tart yogurt made with buttermilk cultures, while providing 14g of protein per serving.

·         To make their better tasting Greek distinctively ‘Farmstyle’, Tillamook slow churns farm fresh milk with seven active yogurt and buttermilk cultures.

·         Tillamook Farmstyle Greek Yogurt is made with fruits and nuts locally sourced from the Pacific Northwest

·         To find out where to buy Tillamook Farmstyle Greek Yogurt readers can use the handy ‘Where to Buy’ tool by clicking here.

*Full disclosure: Tillamook provided me with product to use in this and other posts. My opinions are 100% my own and this post contains no affiliate links. 

Miso Deviled Eggs

Ingredients

  • 1 dozen eggs, room temperature
  • 1 1/2 teaspoons hot mustard
  • 2 tablespoons white miso (shiro miso)
  • 2/3 cup 2% or full-fat plain Greek yogurt (I used Tillamook because of it's mild, creamy flavor)
  • 1/4 cup chopped chives or green onions
  • Shichimi togarashi or other fine red pepper flakes for garnish (you can also use paprika in a pinch)
  • salt & pepper to taste (optional)

Instructions

  1. Prepare an ice bath in a large bowl before you begin hard boiling the eggs.
  2. Gently set the eggs in the bottom of a large pot and fill with cold water until the eggs are covered by about one inch.
  3. Place the pot over medium heat and bring to a low boil.
  4. Turn off the heat, cover the pot, and let sit for 6 minutes.
  5. Remove the eggs from the pot with a slotted spoon and transfer to your prepared ice bath.
  6. When the eggs have cooled (after about 10 minutes) peel the eggs by first tapping them against the countertop. I like to crack around the equator of the egg and at each end.
  7. Using the side of your thumb, carefully peel away the egg and the thin membrane between the egg shell and the egg itself.
  8. After hard boiling the eggs and removing the shells, cut them in half and remove the yolk using a small spoon. Collect the yolks in a medium bowl and set the emptied whites on a large plate.
  9. In the bowl of a food processor, combine the yolks, mustard, yogurt, and miso paste and pulse until smooth. Stir in the chives.
  10. Using a teaspoon, fill each egg half with the yolk mixture. Garnish with a few additional chives and the shichimi togarashi.
  11. Arrange the eggs on a platter and serve chilled.
In Breakfast & Brunch, Cocktails and Appetizers Tags brunch recipes, Easter recipes, Eggs, miso, shichimi togarashi, spring recipes
3 Comments
← NewerOlder →

Search Posts


Featured Posts

Summary Block
This is example content. Double-click here and select a page to feature its content. Learn more
Featured
Nov 2, 2025
Cursus Amet
Nov 2, 2025
Nov 2, 2025
Oct 26, 2025
Pellentesque Risus Ridiculus
Oct 26, 2025
Oct 26, 2025
Oct 19, 2025
Porta
Oct 19, 2025
Oct 19, 2025
Oct 12, 2025
Etiam Ultricies
Oct 12, 2025
Oct 12, 2025
Oct 5, 2025
Vulputate Commodo Ligula
Oct 5, 2025
Oct 5, 2025
Sep 28, 2025
Elit Condimentum
Sep 28, 2025
Sep 28, 2025
Sep 21, 2025
Aenean eu leo Quam
Sep 21, 2025
Sep 21, 2025
Sep 14, 2025
Cursus Amet
Sep 14, 2025
Sep 14, 2025
Sep 7, 2025
Pellentesque Risus Ridiculus
Sep 7, 2025
Sep 7, 2025
Aug 31, 2025
Porta
Aug 31, 2025
Aug 31, 2025

Powered by Squarespace